Webscale is a big supporter of going headless, taking your monolithic server application like Magento or WordPress offline and using it to generate a static site. This time we’ll try out Gatsby, a static site generator that gets my content from WordPress via API and then constructs a site based on the Gatsby template or theme I’ve chosen, built, or modified.
In the previous installment, I went through using the Duplicator plugin to create a copy of my personal WordPress site, installing that copy to my laptop with Local, and then generating a static copy of my site with WP2Static. You can [link] hop over to the WP2Static WordPress experiment article [/link] if you want the details.
A “generator” vs a “scraper”
As mentioned below, Gatsby gets information from my WordPress installation via API and then generates a site based on a theme (and possibly plugins). It’s a site generator.
WP2Static, used in the prior blog, literally builds a map of every page your WordPress site might generate, then uses a web crawler to copy (or “scrape”) all of them, and does some post-processing to make them work as a standalone static site.
The advantage of a generator like Gatsby is that if I decide to dump WordPress for another content management system, all my design and functionality work doesn’t need to be duplicated. I can do some remapping on the backend and the Gatsby-generated frontend can remain the same, or at least very similar.
The disadvantage is that I (might) lose a lot of the design elements I built into my existing WordPress site. I’ll need to do more work on Gatsby to get the look and feel my old site had. On the other hand, this may be the perfect excuse for a redesign.
Gatsby has a large showcase of open source themes that can provide a great jumping-off point.
With both, if you’re using your WordPress server to handle forms (email sign-up, comments, user registration, search), you will need to find/create alternatives. For example, you might use Disqus to handle comments instead of WordPress.
WordPress + Gatsby Prerequisites
This requires two assistants on the WordPress side to connect Gatsby and your WordPress site in the form of WordPress plugins: WPGraphQL and WPGatsby. I installed those and made sure to copy my GraphQL endpoint from the WPGraphQL plugin’s settings.
 graphql-URL.png
Then I followed the steps in the conveniently provided Gatsby Starter WordPress Blog.
One thing it doesn’t include is to install Gatsby globally with NPM. If you haven’t already, do that first.
npm install -g gatsby-cliNext, install the starter kit (this is all one line below).
gatsby new my-blog-starter https://github.com/gatsbyjs/gatsby-starter-wordpress-blogConfiguring Gatsby for Local WordPress
This will create a folder named my-blog-starter. Navigate into that directory. Create a file called .env.development.
Open it and add the following line to make sure you don’t have issues with SSL certificates:
NODE_TLS_REJECT_UNAUTHORIZED=0Save, then open gatsby-config.js for editing.
First, add the following to the top. It’s only necessary for this configuration where the demo uses a locally hosted WordPress site and a self-signed certificate. It will also only work in development mode. If you’re planning to do more than play, a more production-ready environment would be required.
require("dotenv").config({
 path: `.env.${process.env.NODE_ENV}`,
})
Next, head down to the first plugin entry…
      resolve: `gatsby-source-wordpress`,
      options: {
        // the only required plugin option for WordPress is the GraphQL url.
        url:
          process.env.WPGRAPHQL_URL ||
          `https://wpgatsbydemo.wpengine.com/graphql`,
      },
},
Replace https://wpgatsbydemo.wpengine.com/graphql with the URL you copied from your WPGraphQL settings. In my case, that’s https://lmpcdemo.local/graphql.
Save the file. Open a command prompt in the same folder and run gatsby develop from the command line. It’ll take a minute or two for the first build and then:
You can now view gatsby-starter-wordpress-blog in the browser.
http://localhost:8000/
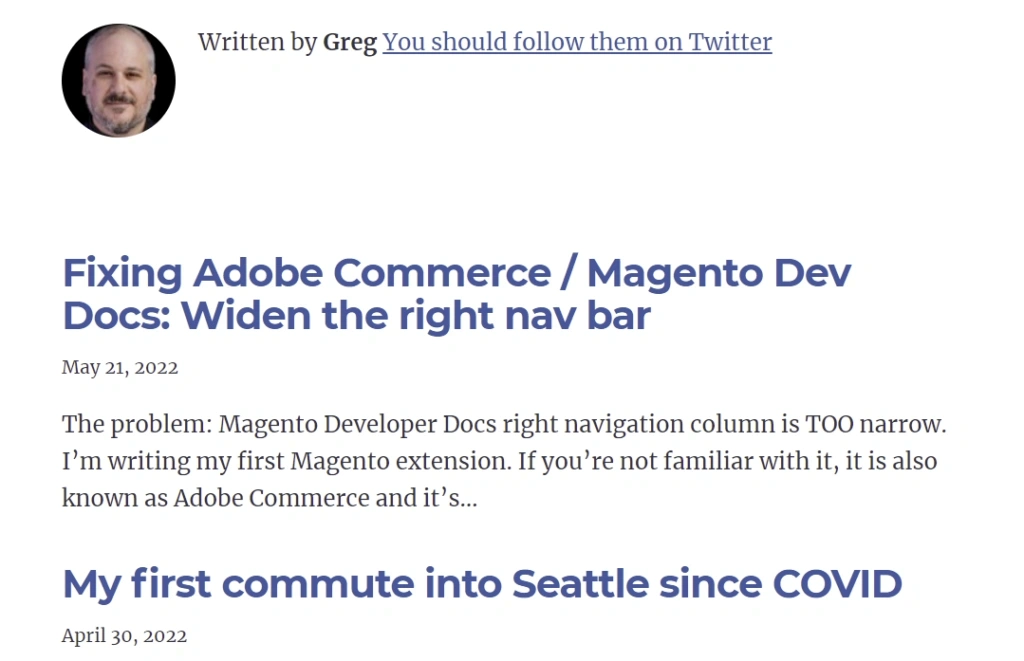
When I visited localhost:8000 in my browser, it wasn’t super amazing, but it worked. It was my old WordPress blog with the contents pulled by API and fit into the default Gatsby template. At this point I was able to edit the template or do other things. For example…
 Gatsby-prechange.png
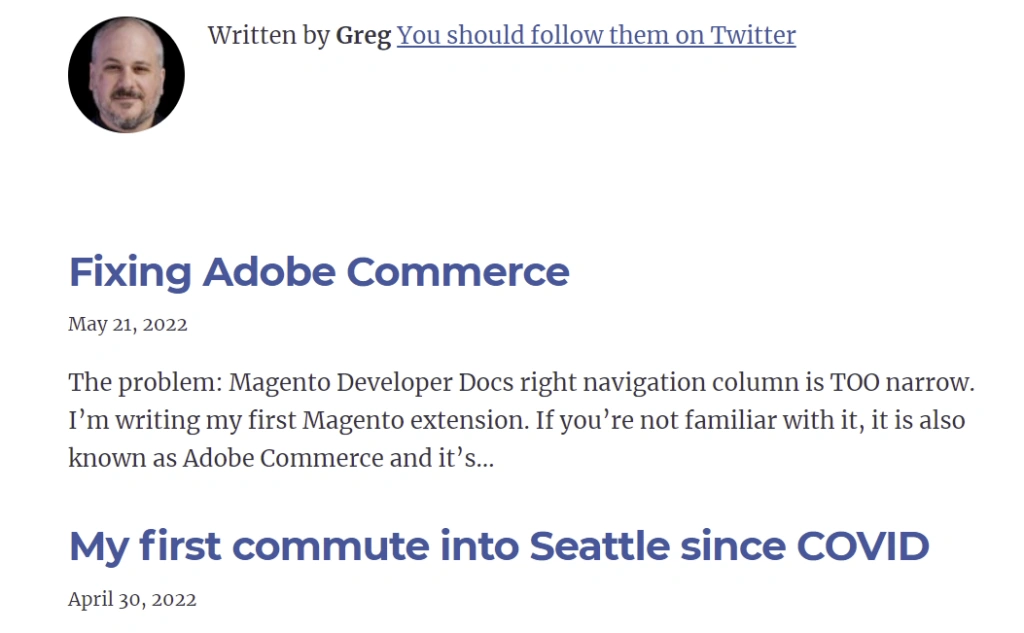
Gatsby watches the blog for changes.
 Gatsby-postchange.png
I went into my local version of my site and changed the title of the latest post. The post title was updated automatically in my locally running Gatsby site.
I’ve cropped the title/domain off the top of the screen captures to make more room for content. Still the blog title was there. It was a very clean, minimalist copy of my blog.
Final thoughts
Which is better, a scraper or a generator? It depends on your plans and timeline.
If you’re in a hurry, not changing much of the design… scraping.
You can likely push a simple blog from a WordPress site to a scraped static version with a couple of days of work, There might be a few migration issues, like moving to a 3rd party service for comments and site search, but in general it would keep your site mostly as is while reaping the benefits of headless.
If you’re planning a redesign… generating.
If you’re generating and you want more than a minimalist theme, you’ll need to do some redesigning anyway. The benefit is that you can more easily adapt that design to use a different backend if you decide to dump WordPress farther down the road. The learning curve is definitely higher, but if you already have some React developers on staff, it shouldn’t be hard for them to jump in.
Whichever you’re choosing to do… talk to us.
Webscale can help deliver it on the cloud, secure it, and speed it up even further, making your blog safer and faster for you and your customers. If you have us helping you with your ecommerce, but you’re still running your own WordPress blog, talk to our experts about moving your WordPress blog to a headless blog solution, setting up a CI/CD process for publishing updates, and adding it to your package.


