


Image data processing is one of the most under-explored problems in the data science community. Every developer has a unique way of doing it. Some of the tools and platforms used in image preprocessing include Python, Pytorch, OpenCV, Keras, Tensorflow, and Pillow.
Introduction
When building a machine learning/computer vision project, one thing we always need is data. In this case, image data.
Unfortunately, a few problems associated with image data include complexity, inaccuracy, and inadequacy. This is why before building a computer vision model, it is essential that the data is preprocessed (cleaned and processed to the desired format) to achieve the desired results.
In this tutorial, we shall be looking at image data preprocessing, which converts image data into a form that allows machine learning algorithms to solve it.
It is often used to increase a model’s accuracy, as well as reduce its complexity.
There are several techniques used to preprocess image data. Examples include; image resizing, converting images to grayscale, and image augmentation.
Prerequisites
To follow through the tutorial, one needs:
- A Google Colab, or Kaggle account. You may also use Python and Jupyter Notebook installed on your machine.
- Some basic knowledge of Python.
In this tutorial, we shall be using Google Colab. So, after creating a new notebook, the first step will be to load data into our colab environment.
Mounting Google Drive onto Colab
We shall first download the data and then upload it to our Google Drive. Then, we will mount our drive to colab using the code below:
from google.colab import drive
drive.mount("/content/drive/")
Run the cell by clicking shift + enter keys and follow the instructions below:
- Click on the
URLdisplayed to authenticate with your desired Google account where the data drive is located. - Copy the generated authorization code, paste it on the space below the URL, and click the Enter key to execute.
Importing the Dataset
The next step is loading the dataset to colab. To import the dataset, we first need to import some of the necessary libraries.
# importing libraries
import tensorflow
import keras
import os
import glob
from skimage import io
import random
import numpy as np
import matplotlib.pyplot as plt
%matplotlib inline
Once this is done, we will go ahead and import the data, which is now on Google Drive using the code block below:
# Importing and Loading the data into a data frame

dataset_path = '/content/drive/MyDrive/Animals'
class_names = ['Cheetah', 'Jaguar', 'Leopard', 'Lion','Tiger']

# apply glob module to retrieve files/pathnames

animal_path = os.path.join(dataset_path, class_names[1], '*')
animal_path = glob.glob(animal_path)
Now that we have already loaded our dataset onto our workspace, the next step would be to visualize the data.
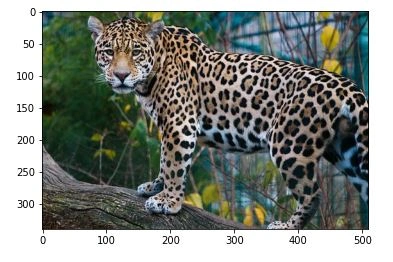
To verify if our data is properly loaded, we shall try accessing an image file from the dataset:
# accessing an image file from the dataset classes
image = io.imread(animal_path[4])

# plotting the original image
i, (im1) = plt.subplots(1)
i.set_figwidth(15)
im1.imshow(image)
By executing the above code block, we shall randomly print an image from the dataset.
Data preprocessing
Now that we’re done with importing libraries and data, let’s proceed to data preprocessing.
Since images exist in different formats, i.e., natural, fake, grayscale, etc., we need to take into consideration and standardize them before feeding them into a neural network.
In this tutorial, we shall look at the following image preprocessing techniques:
- Grayscale conversion
- Normalisation
- Data Augmentation
- Image standardization
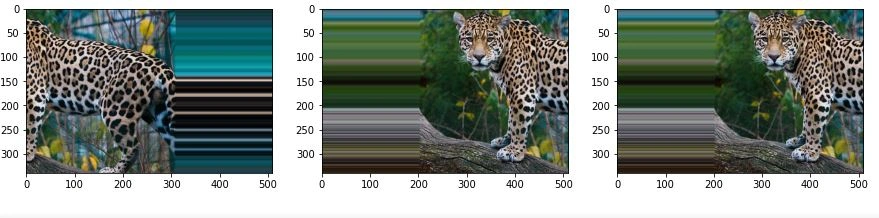
Before we start exploring preprocessing techniques, let’s first explore the RGB channels of our original image;
# plotting the original image and the RGB channels

i, (im1, im2, im3, im4) = plt.subplots(1, 4, sharey=True)
i.set_figwidth(20)

im1.imshow(image)  #Original image
im2.imshow(image[:, : , 0]) #Red
im3.imshow(image[:, : , 1]) #Green
im4.imshow(image[:, : , 2]) #Blue
i.suptitle('Original & RGB image channels')
Output 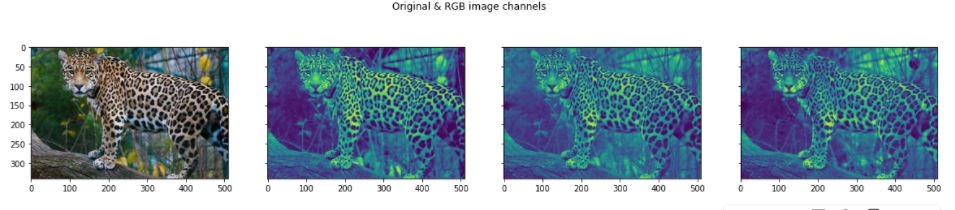
Grayscale conversion
Grayscale is simply converting images from colored to black and white. It is normally used to reduce computation complexity in machine learning algorithms.
Since most pictures don’t need color to be recognized, it is wise to use grayscale, which reduces the number of pixels in an image, thus, reducing the computations required.
Execute the code below to convert the original image to grayscale:
gray_image = skimage.color.rgb2gray(image)
plt.imshow(gray_image, cmap = 'gray')
Output 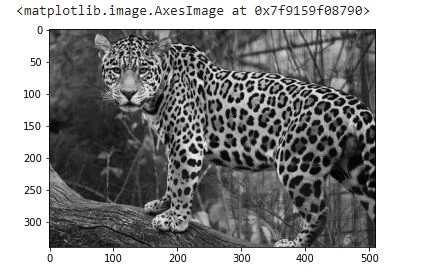
NB: Converting images to grayscale might not always be practical in solving some problems. A few examples where it would be impractical to use grayscale include: traffic lights, healthcare diagnosis, autonomous vehicles, agriculture, etc. The best way to know whether to use it or not depends on your human visual ability to identify an object without color.
Normalization
Also referred to as data re-scaling, it is the process of projecting image data pixels (intensity) to a predefined range (usually (0,1) or (-1, 1)). This is commonly used on different data formats, and you want to normalize all of them to apply the same algorithms over them.
Normalization is usually applied to convert an image’s pixel values to a typical or more familiar sense.
Its benefits include:
- Fairness across all images – For example, scaling all images to an equal range of [0,1] or [-1,1] allows all images to contribute equally to the total loss rather than when other images have high and low pixels ranges give strong and weak loss, respectively.
- Provides a standard learning rate – Since high pixel images require a low learning rate and low pixel images high learning rate, re-scaling helps provide a standard learning rate for all images.
Let’s write the code below to normalize our data.
norm_image = (gray_image - np.min(gray_image)) / (np.max(gray_image) - np.min(gray_image))
plt.imshow(norm_image)
Output 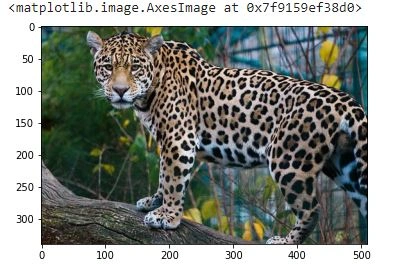
Data augmentation
Data augmentation is the process of making minor alterations to existing data to increase its diversity without collecting new data.
It is a technique used for enlarging a dataset. Standard data augmentation techniques include horizontal & vertical flipping, rotation, cropping, shearing, etc.
Performing data augmentation helps in preventing a neural network from learning irrelevant features. This results in better model performance.
Standard data augmentation techniques include horizontal & vertical flipping, rotation, cropping, shearing, etc.
There are two types of augmentation:
- Offline augmentation – Used for small datasets. It is applied in the data preprocessing step. We will be covering this augmentation in this tutorial.
- Online augmentation– Used for large datasets. It is normally applied in real-time.
For this tutorial, we shall use Keras’s ImageDataGenerator class to augment our data. This is because it provides a quick and easy way to augment your images.
In addition, it supports augmentation techniques such as flips, rotations, brightness change, etc.
Let’s now look at the most used data augmentation techniques:
Shifting
This is the process of shifting image pixels horizontally or vertically.
Let’s look at an example below that shifts horizontally:
# import libraries

from numpy import expand_dims
from keras.preprocessing.image import load_img
from keras.preprocessing.image import img_to_array
from keras.preprocessing.image import ImageDataGenerator

# convert to numpy array
data = img_to_array(image)

# expand dimension to one sample
samples = expand_dims(image, 0)

# create image data augmentation generator
datagen = ImageDataGenerator(width_shift_range=[-200,200])

# create an iterator
it = datagen.flow(samples, batch_size=1)
fig, im = plt.subplots(nrows=1, ncols=3, figsize=(15,15))

# generate batch of images
for i in range(3):

    # convert to unsigned integers
    image = next(it)[0].astype('uint8')

    # plot image
    im[i].imshow(image)
Output
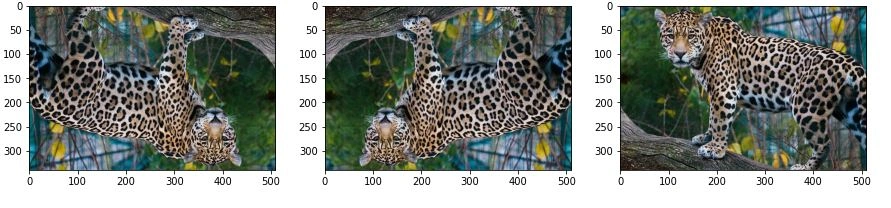
Flipping
This reverses the rows or columns of pixels in either vertical or horizontal cases, respectively.
Let’s do a random flip with both horizontal and vertical flips. From the code above, change the ImageDataGenerator parameters as shown below:
# ImageDataGenerator for flipping
datagen = ImageDataGenerator(horizontal_flip=True, vertical_flip=True)
Output
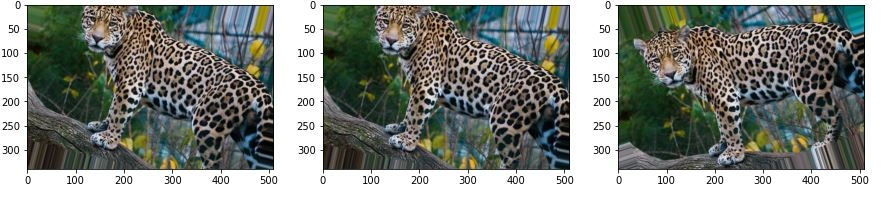
Rotation
This process involves rotating an image by a specified degree.
From the code above, change the ImageDataGenerator parameters, as shown below:
datagen = ImageDataGenerator(rotation_range=20, fill_mode='nearest')
Output
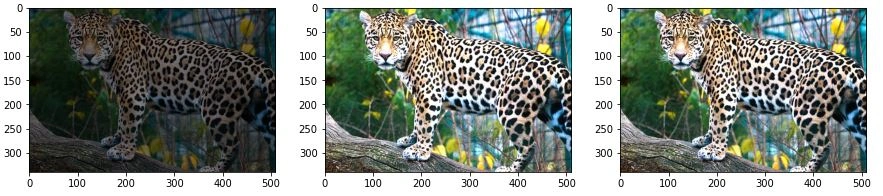
Changing brightness
This is the process of increasing or decreasing image contrast.
From the code above, change the ImageDataGenerator parameters, as shown below:
datagen = ImageDataGenerator(brightness_range=[0.5,2.0])
Output
Other Augmentation techniques include:
Cropping
This is the process of creating a random subset of an original image which is then resized to the size of the original image.
Scaling
An image can be scaled either inward or outward. When scaling an image outward, the image becomes more significant than the original and vise versa.
Standardizing images
Standardization is a method that scales and preprocesses images to have similar heights and widths. It re-scales data to have a standard deviation of 1 (unit variance) and a mean of 0.
Standardization helps to improve the quality and consistency of data.
From the code above, change the ImageDataGenerator parameters as shown below:
# creating the image data generator to standardize images
datagen = ImageDataGenerator(featurewise_center =True,
      featurewise_std_normalization = True)
Conclusion
Having explored the popular and commonly used image preprocessing techniques, what now remains is modeling your machine learning models to the desired level of high accuracy and performance. Thus, we are now ready to jump into building custom computer vision projects.
Good luck!


Comments: