


Images with constant resolution can at times not bring out the desired information and accurate details. To overcome this challenge, there is a need for the adjustment of resolutions in an image. We will be changing the images to a higher and lower resolution with the help of LapSRN.
In this tutorial, we will need to use some basic tools, such as OpenCV, used in computer vision-based tasks, which is the main function required for image processing.
Prerequisites
The reader has to be familiar with the Python programming language basics to follow along with this tutorial. Refer to this beginners guide to Python.
How to install and use Pillow and NumPy
Using any text editor of your choice, you will be required to run a few codes. To work with cv2, you will be required to install OpenCV.
To implement this, in your terminal, run the command below if you don’t have it pre-installed.
pip install OpenCV-Python
After openCV has been installed, it allows for importing modules such as cv2. The second installation to be done is the NumPy.
pip install numpy
This allows for the usage of packages implementing multidimensional arrays. The third installation to be carried out involves pillow installation.
pip install pillow
Also known as the PIL module, it allows for manipulating and processing images. Depending on the versions, you may be required to update to the latest version.
To update to the latest version, we will use the below command:
C:\Users\lizpa\PycharmProjects\jupyter\venv\Scripts\python.exe -m pip install --upgrade pip
You will have to change the path according to your machine’s directory.
Having the colors fixed
Images are made up of pixels in the form of X and Y coordinates. Having the colors fixed, we will have to use the RGB color format.
This occurs when one color in the RGB format is omitted. Let’s say if blue is omitted, the image will lack the blue pigment and any traces of it since every single pixel has blue taken away from it, leaving only red and green components.
Below is a program for further illustration:
from PIL import Image
pict = Image.open("sportscar.jpg")
#We will have to use the .bmp extension.
#This allows for other functions to be performed in the image
#Storing the image using save() function
pict.save('sportscar.bmp')
pict = Image.open('sportscar.bmp')
pict.show()
#We create a loop that allows for iteration between the X and Y pixels
for x in range(pict.size[0]):
    for y in range(pict.size[1]):
        r, g, b = pict.getpixel((x, y))
        pict.putpixel((x, y), (r, g, 0))
 #Used for displaying the executed image.
pict.show()
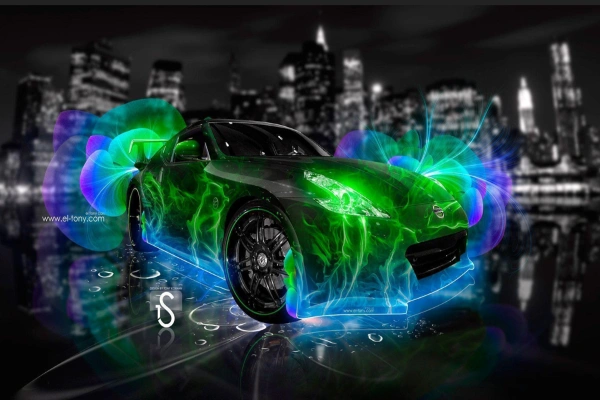
Original image:
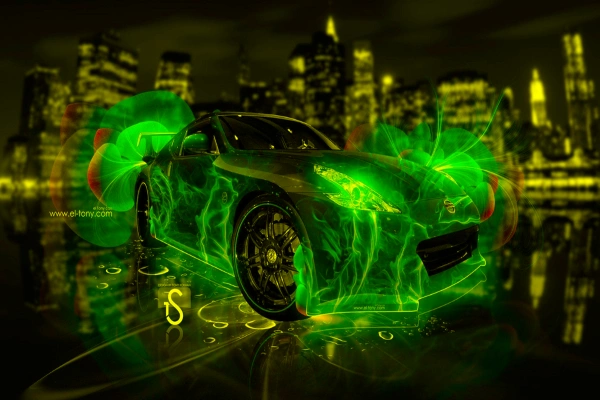
Fixed image with blue pixels omitted:
Implementing contrast enhancement
Contrast deals with the intensity, saturation, and brightness level in an image. We will be adjusting the contrast with the help of the ImageFilter function provided by the PIL module.
With the above in place, we are fit to dive into the coding section using an image of your choice:
from PIL import Image, ImageFilter
img = Image.open("cool.jpg")
enc_img = img.filter(ImageFilter.DETAIL)
assert isinstance(enc_img, object)
enc_img.show()
Next, we will run the code for image enhancement as shown below:
 from PIL import Image, ImageEnhancement
 img = Image.open("cool.jpg")
 img_con = ImageEnhancement.Contrast(img)
img_con.enhace(1.7).show("70% INCREASEMENT OF CONTRAST ENHANCEMENT")
For the above to work, you will have to put the images to be used in the same directory as where the main python file is.
Laplacian Pyramid Super-Resolution Network
In a coarse-to-define Laplacian pyramid structure, the LapSRN super-resolves low-resolution pictures. On a given out of 5 benchmark datasets for 4x and 8x super-resolution, our technique is quick and achieves state-of-the-art performance.
LapSRN is a middle ground between the two upscaling procedures used at the beginning and the end of a project. It suggests a gradual increase in size till the end. Its name is derived from Laplacian pyramids.
The construction is like a pyramid with the lower quality image being upscaled till the end. Parameter sharing is frequently used for speed. It has two parts, the extraction stage, and the reconstruction stage.
The Laplacian pyramid is formed by the difference between the level in the Gaussian Pyramid and the extended version of its upper level in the pyramid.
Let us get started!
Instance 1
Scaling down the images to lower resolution
We will scale down the images to lower resolutions in the Gaussian Pyramid model. To perform this task we will be using the image below:

import cv2
import numpy as np
img = cv2.imread("sean.jpg")#Here we will be reading the image
layer = img.copy()
gp = [layer] #Declaring a variable hence creating the Gaussian Pyramid array.
for j in range(10):#Providing room for iteration.
    layer = cv2.pyrDown(layer)
    gp.append(layer)
    cv2.imshow(str(j), layer)#This function displays the multiple images created.
cv2.imshow("Original image", img)#This will have the original image displayed.
cv2.waitKey(0)
cv2.destroyAllWindows()
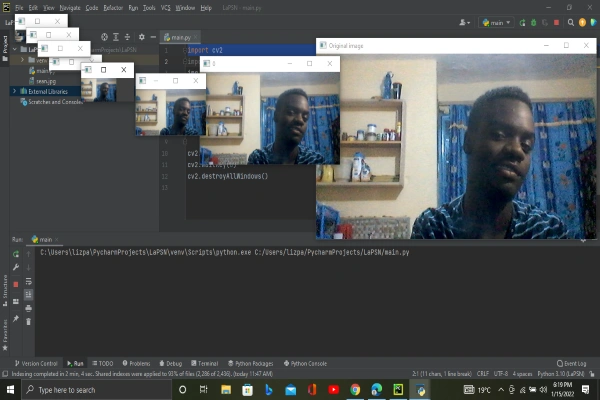
Your output should be like the image shown below.
Instance 2
Scaling up the images to higher resolutions.
Once you increase the resolution of an already lowered resolution image, it will not go back to its original form. This is because lowering the resolution loses some information about the image using the pyrDown method hence the results look a little blurred.
This is different from scaling up an original image.
import cv2
import numpy as np
img = cv2.imread("sean.jpg")
#We will be factoring down images using the already scaled.
lwr1 = cv2.pyrDown(img)
lwr2 = cv2.pyrDown(lwr1)
lwr3 = cv2.pyrDown(lwr2)
lwr4 = cv2.pyrDown(lwr3)
# We will be Increasing the resolution of already scaled down image that is lwr4.
hir1 = cv2.pyrUp(lwr3)

cv2.imshow("Original image", img)
cv2.imshow("First Scaled Down Image", lwr1)
cv2.imshow("Second Scaled Down Image", lwr2)
cv2.imshow("Third Scaled Down Image", lwr3)
cv2.imshow("Fourth Scaled Down Image", lwr4)
cv2.imshow("First Scaled Up Image", hir1)

cv2.waitKey(0)
cv2.destroyAllWindows()
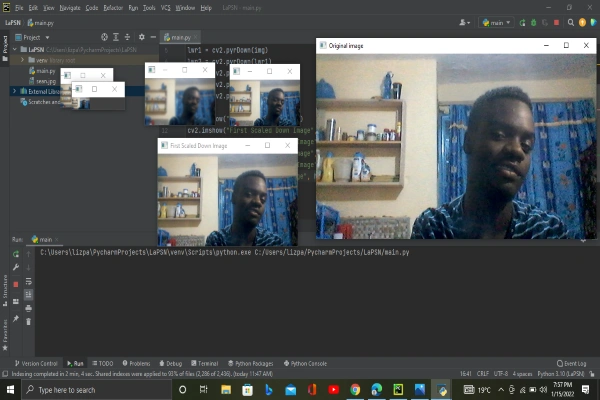
Your output should be like the image shown below.
Instance 3
To construct the Laplacian pyramid Super-Resolution Network. We will take the top-level layer of the Gaussian Pyramid, which is the last image generated using the loop function. We then create a list for the Laplacian pyramid.
Lastly, we create the extended version of the upper level of the Gaussian pyramid. To understand it better, we will use the code snippet below:
import cv2
img = cv2.imread("sean.jpg")
layer = img.copy()
gp = [layer]
for j in range(2):
    layer = cv2.pyrDown(layer)
    gp.append(layer)

layer = gp[2]
cv2.imshow("Gausian Upper level", layer)
lp = [layer]#Introduce and create a list for the Laplacian pyramid.

for j in range(2, 0, -1):
    Gausian_extended = cv2.pyrUp(gp[j])#Creating the Laplacian pyramid.
laplacian = cv2.subtract(gp[j-1], Gausian_extended)
cv2.imshow(str(j), laplacian)

cv2.imshow("Original image", img)
cv2.waitKey(0)
cv2.destroyAllWindows()
Confirm with the below displayed:

The Laplacian pyramid and the Gaussian pyramid are applied in the blending and reconstruction of the images.
Application fields for adjusting image resolution
- Astronomy – This is achieved by focusing on tiny information of images to higher resolutions that bring out clearer vision.
- Closed Circuit Television – Feeds received from a CCTV footage can be focused to get clearer images by resolving and fixing the colors where possible.
- Medicine – Images received from scans such as the X-Rays need adjustment of resolutions to provide detailed and accurate information.
Conclusion
Covering all the details required in this tutorial, that is:
- Knowing how to fix colors.
- Implementation of the contrast enhancement.
- Scaling the images to a lower or higher resolution.
- Derivation of the Laplacian pyramid.
- Application fields for adjusting image resolution.
You are now equipped to handle matters concerning this tutorial. Being able to accurately work with image resolution adjustment, and produce the best results.
Happy coding!


Comments: