


In this tutorial, we are going to learn how to make a registration form using React.js and connect it with firebase from scratch using React hooks, Bootstrap, and Firebase.
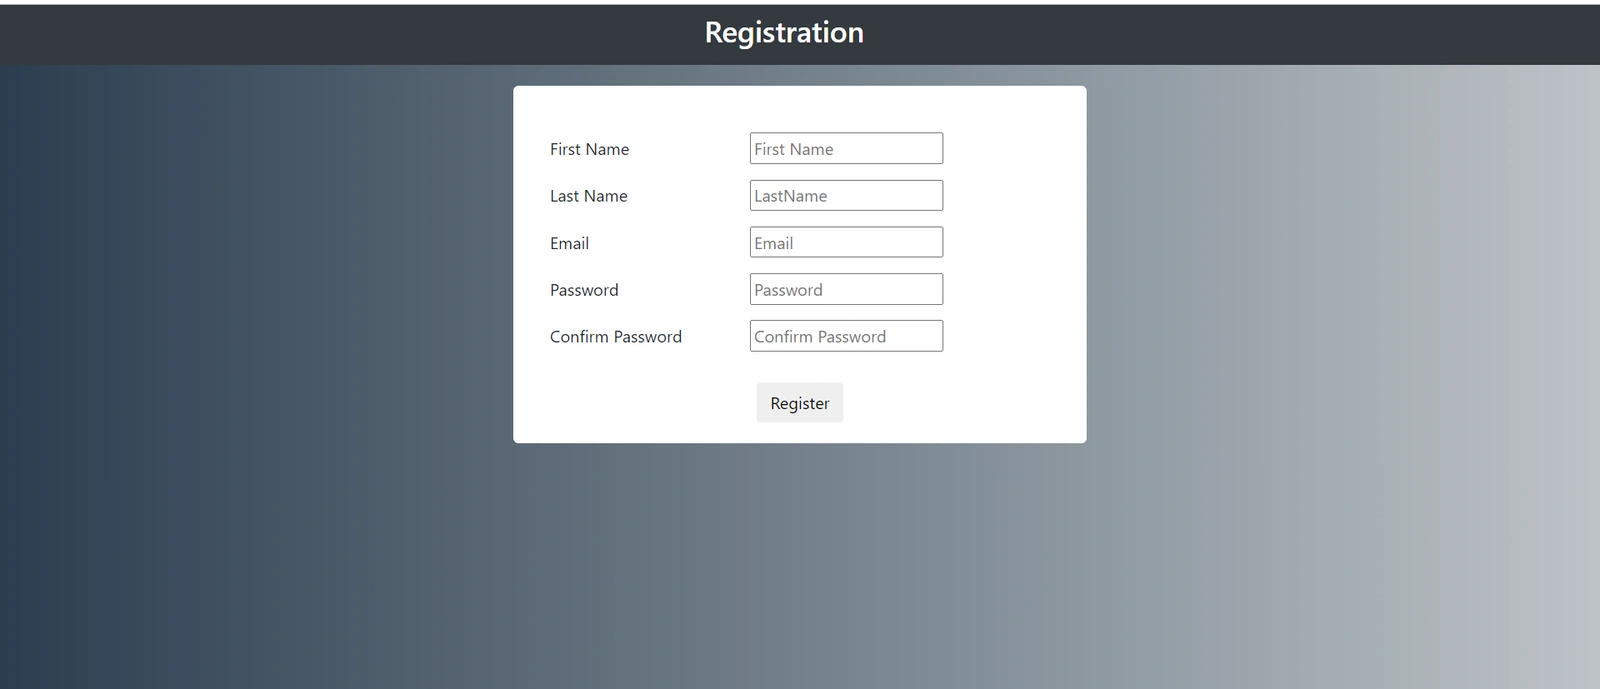
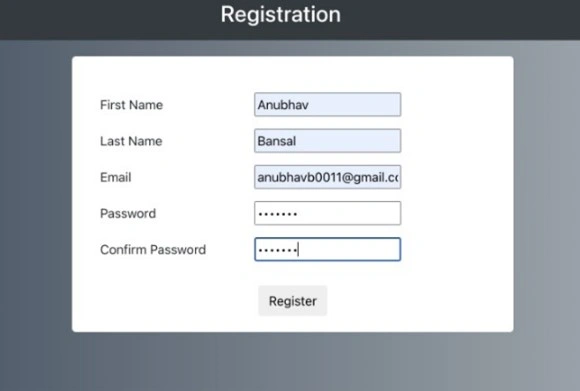
Here is an image of what you will build at the end of this tutorial.
Prerequisites
THe reader will need the following to understand and build along:
- An IDE installed preferably VScode.
- A basic knowledge of HTML and CSS.
- A Firebase account.
- Basic Knowledge of JavaScript.
- Have Node.js installed.
Now that your coding environment is ready. Open up your terminal or PowerShell and run the below commands to create your react app.
npx create-react-app loginforms
cd loginforms
npm start
After running the commands you will get to see the screen below:

Open up the index.html which is in the public folder and add the CDN links there at the end of the file.
<!DOCTYPE html>
<html lang="en">
  <head>
    <meta charset="utf-8" />
    <link rel="icon" href="%PUBLIC_URL%/favicon.ico" />
    <meta name="viewport" content="width=device-width, initial-scale=1" />
    <meta name="theme-color" content="#000000" />
    <meta
      name="description"
      content="Web site created using create-react-app"
    />
    <link rel="apple-touch-icon" href="%PUBLIC_URL%/logo192.png" />
    <link rel="stylesheet"
          href="https://maxcdn.bootstrapcdn.com/bootstrap/4.0.0/css/bootstrap.min.css"
          integrity="sha384-Gn5384xqQ1aoWXA+058RXPxPg6fy4IWvTNh0E263XmFcJlSAwiGgFAW/dAiS6JXm"
          crossorigin="anonymous">

    <link rel="manifest" href="%PUBLIC_URL%/manifest.json" />
    <title>React App</title>+
  </head>
  <body>
    <noscript>You need to enable JavaScript to run this app.</noscript>
    <div id="root"></div>
    <script src="https://code.jquery.com/jquery-3.2.1.slim.min.js" integrity="sha384-KJ3o2DKtIkvYIK3UENzmM7KCkRr/rE9/Qpg6aAZGJwFDMVNA/GpGFF93hXpG5KkN" crossorigin="anonymous"></script>
    <script src="https://cdnjs.cloudflare.com/ajax/libs/popper.js/1.12.9/umd/popper.min.js" integrity="sha384-ApNbgh9B+Y1QKtv3Rn7W3mgPxhU9K/ScQsAP7hUibX39j7fakFPskvXusvfa0b4Q" crossorigin="anonymous"></script>
    <script src="https://maxcdn.bootstrapcdn.com/bootstrap/4.0.0/js/bootstrap.min.js" integrity="sha384-JZR6Spejh4U02d8jOt6vLEHfe/JQGiRRSQQxSfFWpi1MquVdAyjUar5+76PVCmYl" crossorigin="anonymous"></script>
  </body>
</html>

  </body>
</html>
You can change the meta tags as per your preference.
Creating a registration form
The registration form is divided into two components in this tutorial i.e. Header and registrationForm, which will be rendered in App.js.
Create a new folder named components inside the src folder. In the components folder following files will be created:
header.jsregistrationForm.jsstyle.css
Note: In react, JSX is used instead of HTML code. JSX is a markup language that contains HTML & JavaScript.
In the header.js write the following code. You can copy-paste from here as well.
import React from 'react';
function Header() {
    return(
        <nav class="bg-dark navbar-dark navbar">
            <div className="row col-12 d-flex justify-content-center text-white">
                <h3>Registration</h3>
            </div>
        </nav>
    )
}
export default Header;
Now, your header is ready. To display it on the website you have to import the header.js in App.js. Write the following code in the App.js.
import logo from './logo.svg';
import './App.css';
import Header from './components/header';

function App() {
  return (
    <div className="App">
      <Header/>
    </div>
  );
}

export default App;
If you have written the above code correctly the webpage will look like this:
 ;
;
Moving forward to the next component i.e. registrationForm.
It contains the following fields:
- First Name
- Last Name
- Email id
- Password
- Confirm Password
- Submit Button
Next, write the following code in the registrationForm.js to create the form body.
import React, {useState} from 'react';
import './style.css'
function RegistrationForm() {
    return(
      <div className="form">
          <div className="form-body">
              <div className="username">
                  <label className="form__label" for="firstName">First Name </label>
                  <input className="form__input" type="text" id="firstName" placeholder="First Name"/>
              </div>
              <div className="lastname">
                  <label className="form__label" for="lastName">Last Name </label>
                  <input  type="text" name="" id="lastName"  className="form__input"placeholder="LastName"/>
              </div>
              <div className="email">
                  <label className="form__label" for="email">Email </label>
                  <input  type="email" id="email" className="form__input" placeholder="Email"/>
              </div>
              <div className="password">
                  <label className="form__label" for="password">Password </label>
                  <input className="form__input" type="password"  id="password" placeholder="Password"/>
              </div>
              <div className="confirm-password">
                  <label className="form__label" for="confirmPassword">Confirm Password </label>
                  <input className="form__input" type="password" id="confirmPassword" placeholder="Confirm Password"/>
              </div>
          </div>
          <div class="footer">
              <button type="submit" class="btn">Register</button>
          </div>
      </div>
    )
}
export default RegistrationForm;
Your basic form structure is ready but needs some styling. To style your form, write the following code in style.css.
Note: Don’t forget to import
style.cssinregistrationForm.js. In this tutorial, it has already been added.
body{
    background: #bdc3c7;  /* fallback for old browsers */
    background: -webkit-linear-gradient(to right, #2c3e50, #bdc3c7);  /* Chrome 10-25, Safari 5.1-6 */
    background: linear-gradient(to right, #2c3e50, #bdc3c7); /* W3C, IE 10+/ Edge, Firefox 16+, Chrome 26+, Opera 12+, Safari 7+ */
}

.form{
    background-color: white;
    border-radius: 5px;
    width: 550px;
    margin: 20px auto;
    padding: 20px;
    /* height: 600px; */
}

.form-body{
    text-align: left;
    padding: 20px 10px;
}

.form-body > *{
    padding: 5px;
}

.form__label{
    width: 40%;
}

.form_input{
    width: 60%;
}

.footer{
    text-align: center;
}
Add this component in App.js.
import logo from './logo.svg';
import './App.css';
import Header from './components/header';
import RegistrationForm from './components/registrationForm'

function App() {
  return (
    <div className="App">
      <Header/>
      <RegistrationForm/>
    </div>
  );
}

export default App;
Implementing hooks in registration form
In this section, you will have an overview of hooks in react.js. For more details I recommend you to first go through react official documentation.
useState hook is used to maintain a state of a variable which you can update dynamically using setState.
Now get to your form where you need to maintain the state of every input in the form. So that when users hit submit button you can send the data to the backend API. In vanilla JavaScript it is done using document.getElementById("demo").value while in react we will have a state for every input and update it on every onChange event.
Import useState and setState hooks from react at top of our code. Now we can make a state for all input elements.
    const [firstName, setFirstName] = useState(null);
    const [lastName, setLastName] = useState(null);
    const [email, setEmail] = useState(null);
    const [password,setPassword] = useState(null);
    const [confirmPassword,setConfirmPassword] = useState(null);
We will add two attributes in the input tag to maintain the state variable i.e.
- value
- onChange
Value: The value attribute will contain the name of the fields, that we used while declaring states.
onChange: Write the following code for onChange attribute.
onChange = {(e) => handleInputChange(e)}
<input className="form__input" type="text" value={firstName} onChange = {(e) => handleInputChange(e)} id="firstName" placeholder="First Name"/>
<input  type="text" name="" id="lastName" value={lastName}  className="form__input" onChange = {(e) => handleInputChange(e)} placeholder="LastName"/>
<input  type="email" id="email" className="form__input" value={email} onChange = {(e) => handleInputChange(e)} placeholder="Email"/>
<input className="form__input" type="password"  id="password" value={password} onChange = {(e) => handleInputChange(e)} placeholder="Password"/>
<input className="form__input" type="password" id="confirmPassword" value={confirmPassword} onChange = {(e) => handleInputChange(e)} placeholder="Confirm Password"/>
In the code below, inside the onChange event call the function handleInputChange that will handle state updates of all the input changes.
 const handleInputChange = (e) => {
        const {id , value} = e.target;
        if(id === "firstName"){
            setFirstName(value);
        }
        if(id === "lastName"){
            setLastName(value);
        }
        if(id === "email"){
            setEmail(value);
        }
        if(id === "password"){
            setPassword(value);
        }
        if(id === "confirmPassword"){
            setConfirmPassword(value);
        }

    }
In this function, you get the id and the value entered inside the input box, as soon as you type anything there, the state of that particular field will get updated. This is how you will maintain all the states so that on submit button you can send all the required information to the backend APIs.
In this tutorial handleSubmit function is used in which you will get all the values that are filled in the form. This function will be used to connect the app with the firebase. This is the final code for the registration form which includes all the details you learned above in the tutorial so far.
import React, {useState,setState} from 'react';
import './style.css'
function RegistrationForm() {

    const [firstName, setFirstName] = useState(null);
    const [lastName, setLastName] = useState(null);
    const [email, setEmail] = useState(null);
    const [password,setPassword] = useState(null);
    const [confirmPassword,setConfirmPassword] = useState(null);

    const handleInputChange = (e) => {
        const {id , value} = e.target;
        if(id === "firstName"){
            setFirstName(value);
        }
        if(id === "lastName"){
            setLastName(value);
        }
        if(id === "email"){
            setEmail(value);
        }
        if(id === "password"){
            setPassword(value);
        }
        if(id === "confirmPassword"){
            setConfirmPassword(value);
        }

    }

    const handleSubmit  = () => {
        console.log(firstName,lastName,email,password,confirmPassword);
    }

    return(
        <div className="form">
            <div className="form-body">
                <div className="username">
                    <label className="form__label" for="firstName">First Name </label>
                    <input className="form__input" type="text" value={firstName} onChange = {(e) => handleInputChange(e)} id="firstName" placeholder="First Name"/>
                </div>
                <div className="lastname">
                    <label className="form__label" for="lastName">Last Name </label>
                    <input  type="text" name="" id="lastName" value={lastName}  className="form__input" onChange = {(e) => handleInputChange(e)} placeholder="LastName"/>
                </div>
                <div className="email">
                    <label className="form__label" for="email">Email </label>
                    <input  type="email" id="email" className="form__input" value={email} onChange = {(e) => handleInputChange(e)} placeholder="Email"/>
                </div>
                <div className="password">
                    <label className="form__label" for="password">Password </label>
                    <input className="form__input" type="password"  id="password" value={password} onChange = {(e) => handleInputChange(e)} placeholder="Password"/>
                </div>
                <div className="confirm-password">
                    <label className="form__label" for="confirmPassword">Confirm Password </label>
                    <input className="form__input" type="password" id="confirmPassword" value={confirmPassword} onChange = {(e) => handleInputChange(e)} placeholder="Confirm Password"/>
                </div>
            </div>
            <div class="footer">
                <button onClick={()=>handleSubmit()} type="submit" class="btn">Register</button>
            </div>
        </div>

    )
}

export default RegistrationForm
You can refer to this link to find the full code of this registration form.
Connecting registration form with Firebase
Hurray!! Your Registration form is completed but you need to store the information registered by the user, which will be done by using Firebase.
Good news guys, to use Firebase you don’t need to install any app just need Google/Gmail mail id.
Here, you will learn how to connect your Registration form to Firebase. For that you need to do the following. Click here to Get Started.

- To start your project, click on add project.

- Give you project a name. In this tutorial, Registration-Form is taken.

Then click on continue.
- Then you need to choose Default Account for Firebase.

Then click on “Create project”
Now your project file is ready. You will use it to build the real-time database.
- To make a setup for real-time data you will select “Realtime Database” from the left panel.

Then click on the “Create Database” button. The Setup database dialog box will appear.

You will go to the next step by leaving the default location. Since you are in developing mode, you will select “Start in test mode” and enable it.
Now your database is ready to store real-time data.
You need to create a linkage between your react project and the real-time data.
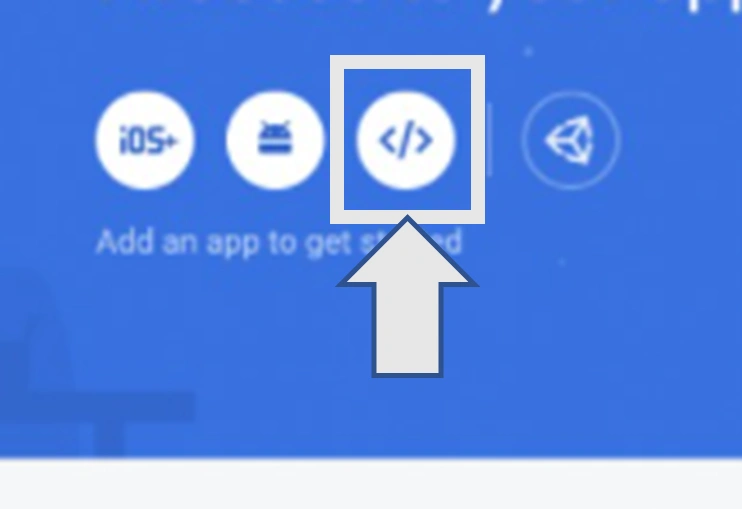
- For that, you will go to project overview from the left panel and then click on the Web button.
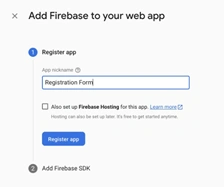
- You have to register your app and give it nickname. In this tutorial “Registration Form” is taken, you can choose any name of your choice.
Since you are not hosting you will NOT select the option “set up Firebase hosting for this app”, then click on Register App.
- Now you need to add the package into your react app. Using the terminal or command prompt go to the directory where your project is and run this command.
npm install firebase
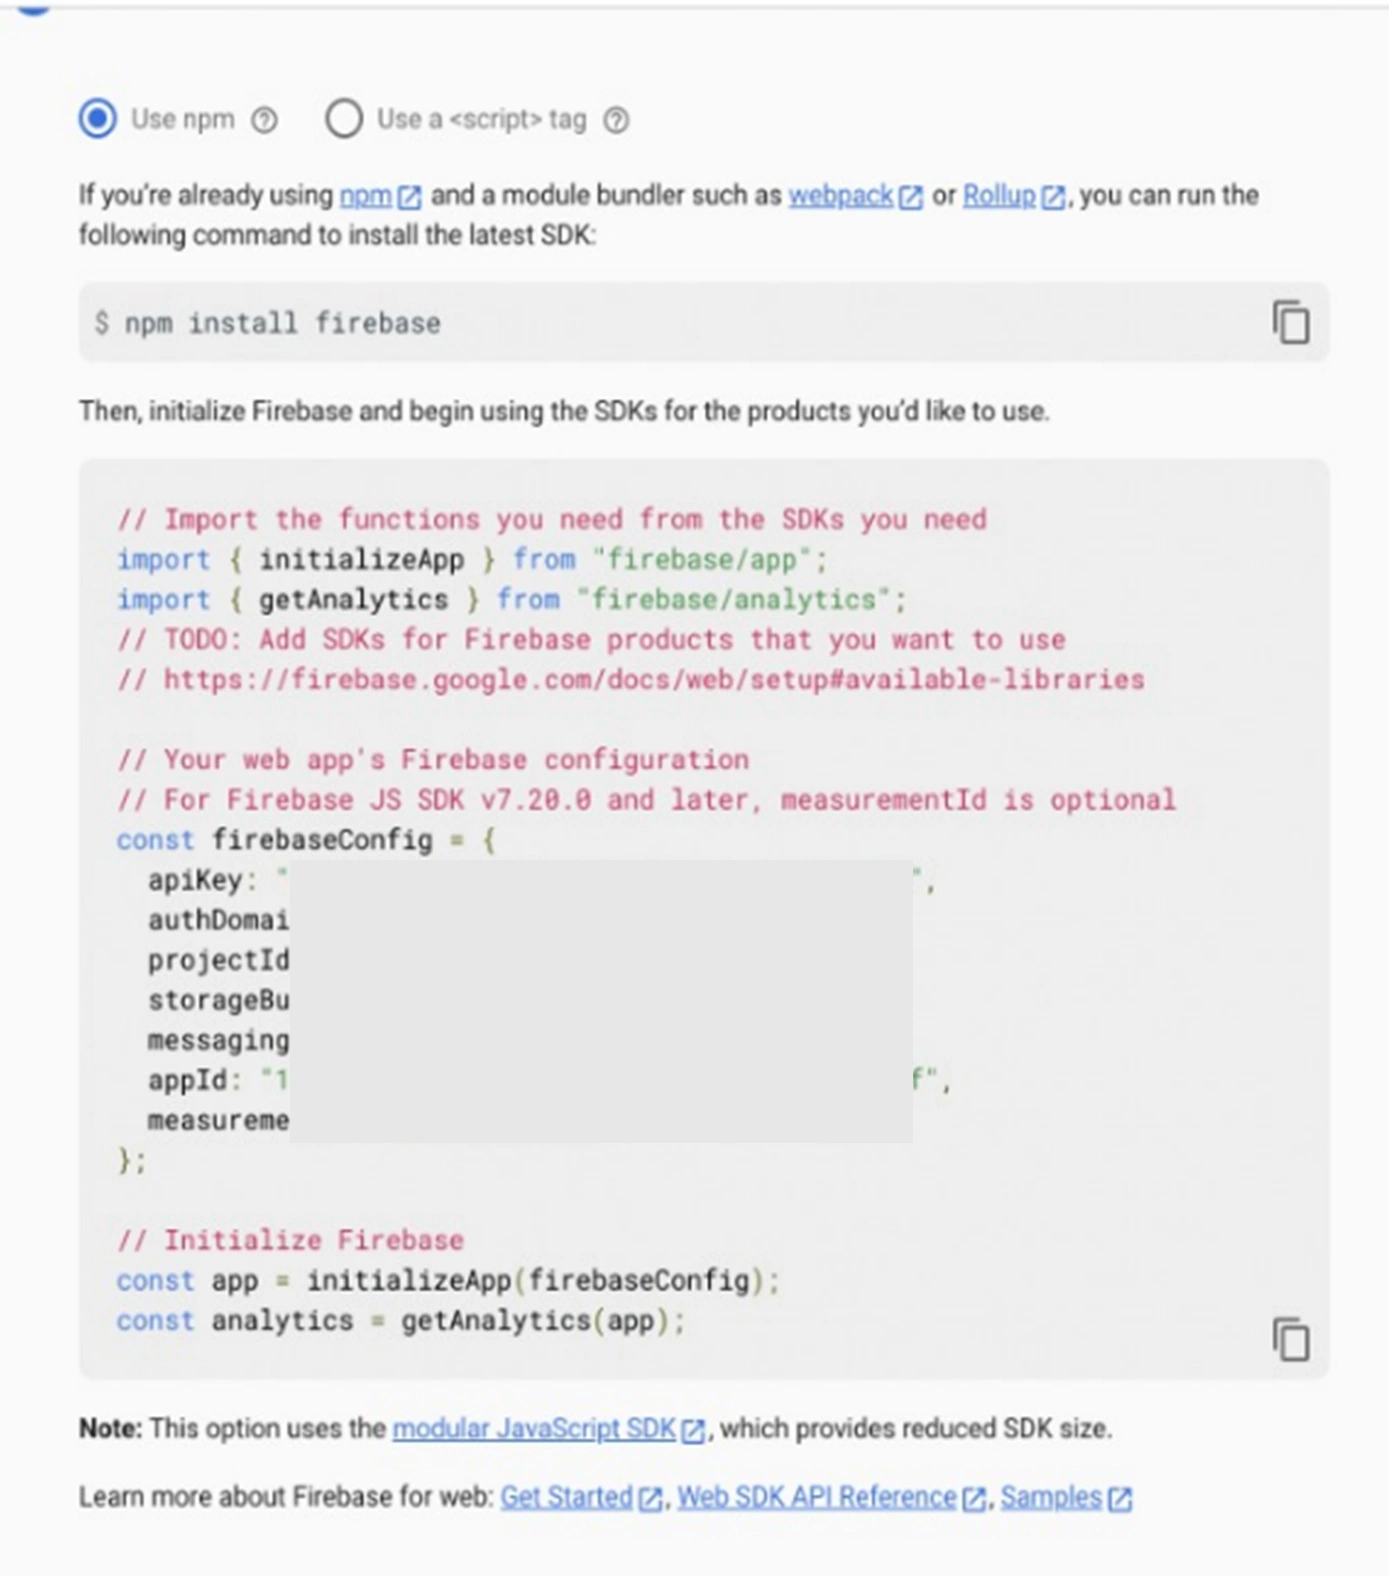
Create a new file with the name “firebase.js” in the Src folder where you will copy the code.
You have to first initialize Firebase in your project. Then import the database into your code.
- To import the data write the following statement.
import { getDatabase } from "firebase/database"
- To use this database in your registration form component you will need to export. Add the code below.
export const database = getDatabase(app);
In the registration form component import the following files.
import {database} from '../firebase'
import {ref,push,child,update} from "firebase/database";
- To store the input entered by the user you need to add the following code in the handle Submit function you made earlier.
const handleSubmit = () =>{
    let obj = {
            firstName : firstName,
            lastName:lastName,
            email:email,
            password:password,
            confirmPassword:confirmPassword,
        }
    const newPostKey = push(child(ref(database), 'posts')).key;
    const updates = {};
    updates['/' + newPostKey] = obj
    return update(ref(database), updates);
}
Now you have completed the steps successfully.
Finally, let’s see how it works.
Fill in your details in the form and then click on register.
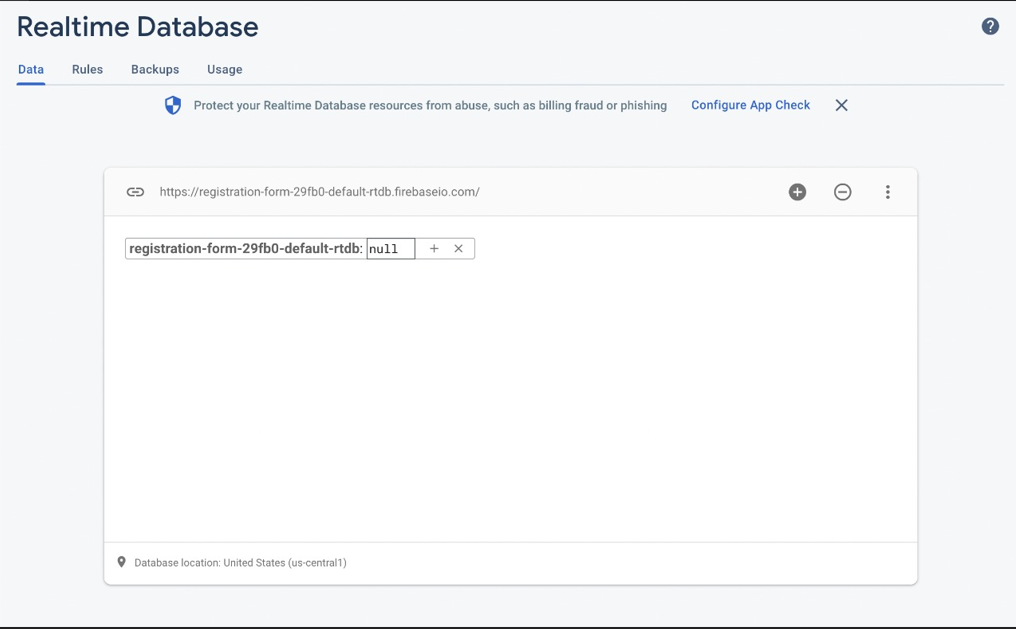
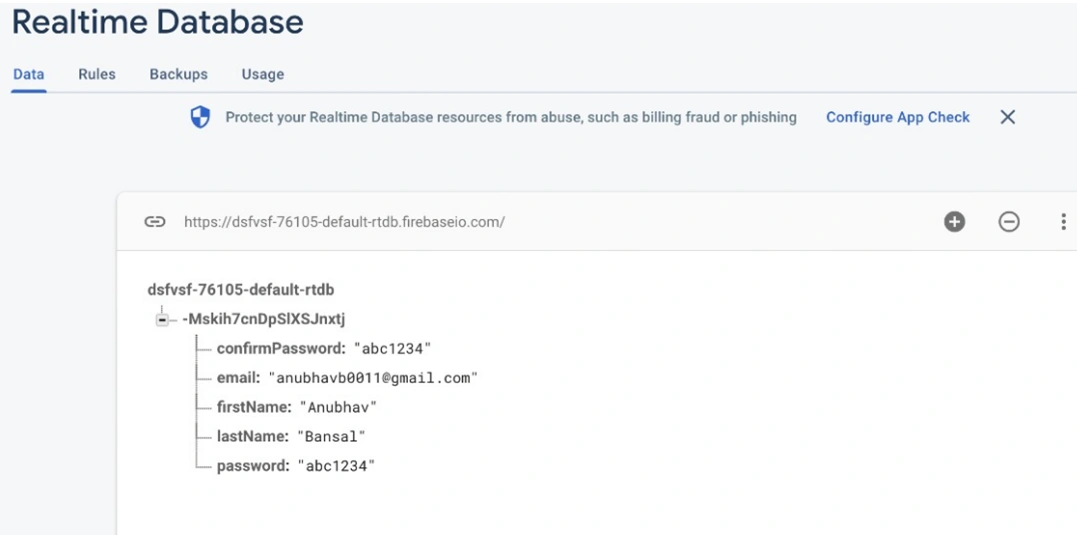
To check the input, you can see that from your Firebase account. It appears as shown below.
Conclusion
Congratulation you have successfully learned how to use React.js to create and structure a registration form, and add styling to it. You also used React Hooks to maintain the state so that you can store the data in Firebase real-time database.
Happy coding!


Comments: