


Cookies are small tokens of data that are stored on the computer. They are used to store user data on the client end.
Some of the details stored on the client’s computer include name, user id, contacts, and address.
ASP.NET supports two sets of cookies; persistent and non-persistent.
Cookies that have an expiry date are referred to as persistent cookies, while those that don’t expire are known as non-persistent cookies.
A session is a state where user values are retrieved and kept on the webpage. It is used to pass data from one page to another in ASP.NET.
A website session allows users to interact with the application and perform operations such as reading and writing on it.
Prerequisites
To follow along with this tutorial, the reader needs:
- Some basic knowledge in C# and .NET programming language.
- Visual Studio installed on your computer.
Creating cookies in ASP.NET
The Response.cookies is used to create a cookie in ASP.NET. We assign a value to the cookie, as shown below.
<%
Response.cookies("StudentName") = "StanleyWambui"
%>
In the above example, our cookie’s name is StudentName and its value is Stanley Wambui.
Next, we set the expiry date of the cookies, as highlighted below:
<%
Response.cookies("StudentName") = "Stanley Wambui"
Response.cookies("StudentName").Expires =#May 05 2022#
%>
In the above code, we set the cookies’ expiration date to May 05, 2022.
Retrieving value of cookies
The Request.cookies command is applied to reveal the cookies’ value. We are retrieving the cookies named StanleyWambui to display on the page.
<%
FirstName = Request.cookie("StudentName")
Response.write("StudentName" = &FirstName)
%>
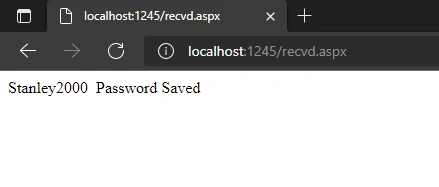
The output will be StudentName Stanley Wambui.
Creating collection of cookies
It’s possible to create a collection of cookies, rather than one at a time. The code below shows the creation of multiple cookies in ASP.NET.
<%
Response.cookies("StudentName")("FullName") = "Stanley Wambui"
Response.cookies("StudentName")("School") = "Computing and Informatics"
Response.cookies("StudentName")("Campus") = "Nairobi"
Response.cookies("StudentName")("Registration") = "380940"
%>
Creating cookies for browsers that don’t support cookies
There are alternative techniques for creating cookies for incompatible browsers. The first method involves generating a form or parameterizing the URL.
Parameterizing involves attaching parameters in the URL, as shown below:
<a href = "About us - Tuko.asp? FileName = Section&LinkName = Blog">
Go to Tuko About us page </a>
This will retrieve values of the file `About us-Tuko.asp’:
<%
FirstName=Request.querystring("stanley")
SirName=Request.querystring("kuria")
response.write("<p> Good Evening" &stanley " " &kuria &"!</p>)
response.write("<p> Hakuna Matata website!</p>)
%>
In the second technique, a form is generated as shown in the code below:
<form
method="post" action="About-Section.asp">
FirstName: <input type="text" name="stanley" value="">
SirName: <input type="text" name="kuria" value="">
<input type="submit" value="Submit">
</form>
We retrieve the values of the file About us-Tuko.asp as follows:
<%
FirstName=Request.querystring("stanley")
SirName=Request.querystring("kuria")
response.write("<p> Good Evening" &stanley " " &kuria &"!</p>)
response.write("<p> Hakuna Matata Tuko!</p>)
%>
Properties of cookies
Below are some common properties of cookies in ASP.NET:
- Value: Manipulates a single cookie.
- Values: Handles and manipulates a collection of cookies.
- Expire: Used to set the expiry date of cookies.
- Domain: Associates cookies to the domain.
Initiation and termination of a session
A Session gets initiated when a user initializes an application for the first time.
If the user is active on the same application, the session memory is allocated to the user.
A session with a dormant user gets terminated automatically. When the user revisits the application, there is no need to create a new session.
This is how sessions are initiated in ASP.NET:
- When a user makes a request, the
Session_Onstartprocedure call is used. - User values are then stored by session objects.
- The server receives requests and initiates a session when the request doesn’t have a valid
sessionID. - An object is initiated with its session using the tag in the global.asa file.
Session termination: - When a user fails to refresh a web page for a specific period, the session gets terminated.
- The webserver experiences an error and shuts down. As a result, all user sessions get terminated.
- Session can also be terminated intentionally when the user quits the application.
- A stateless session does not have any state. They are usually eliminated automatically
Implementation of sessions in ASP.NET
Below is a step-by-step guide on how to implement sessions in ASP.NET.
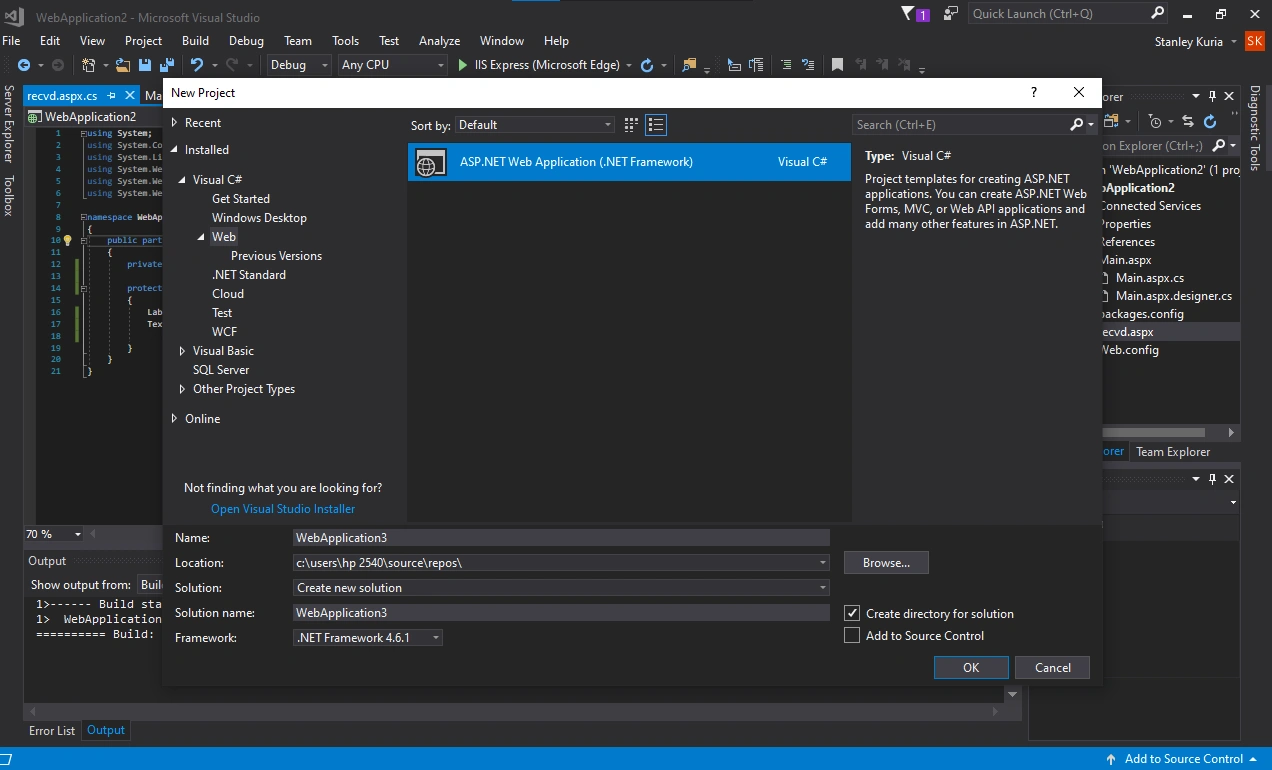
Step 1
Open Visual Studio IDE, click file then select a new project. Next, choose an ASP.NET Application and press ok.
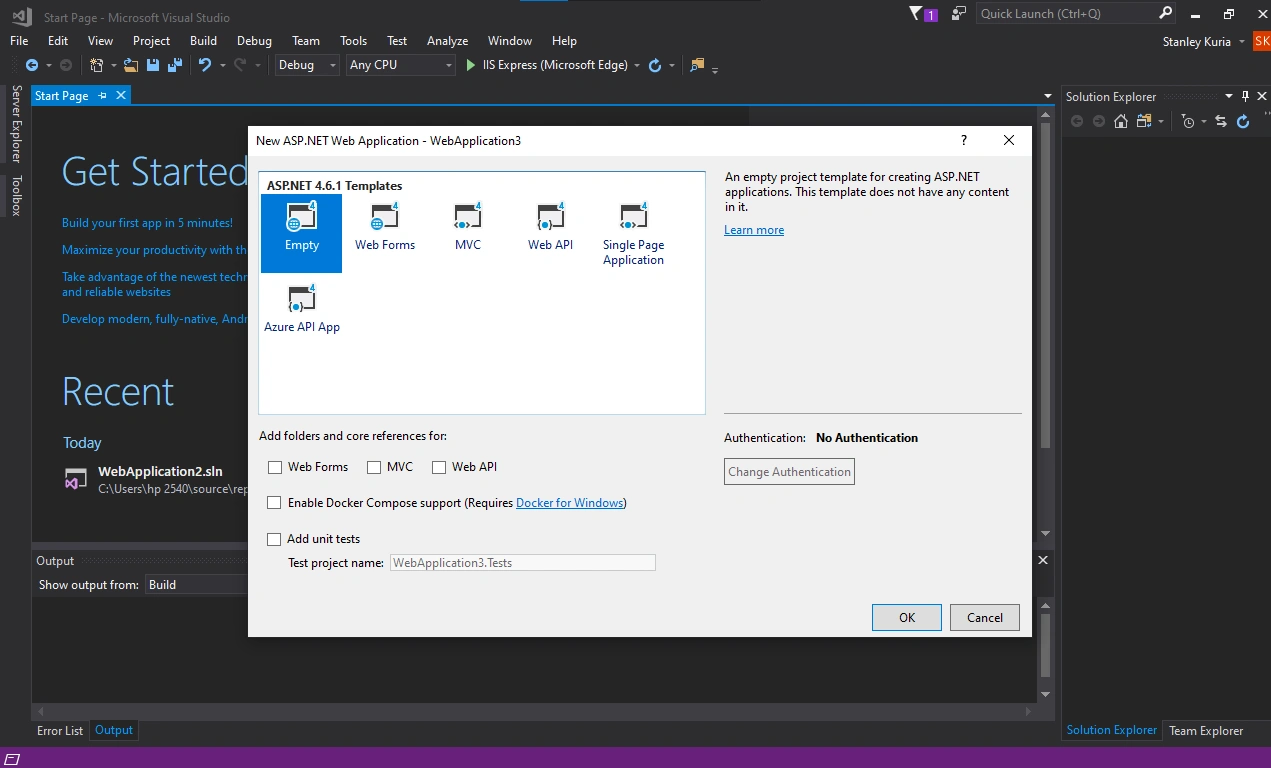
Step 2
Select empty as shown below and then click ok and wait for a moment.
Step 3
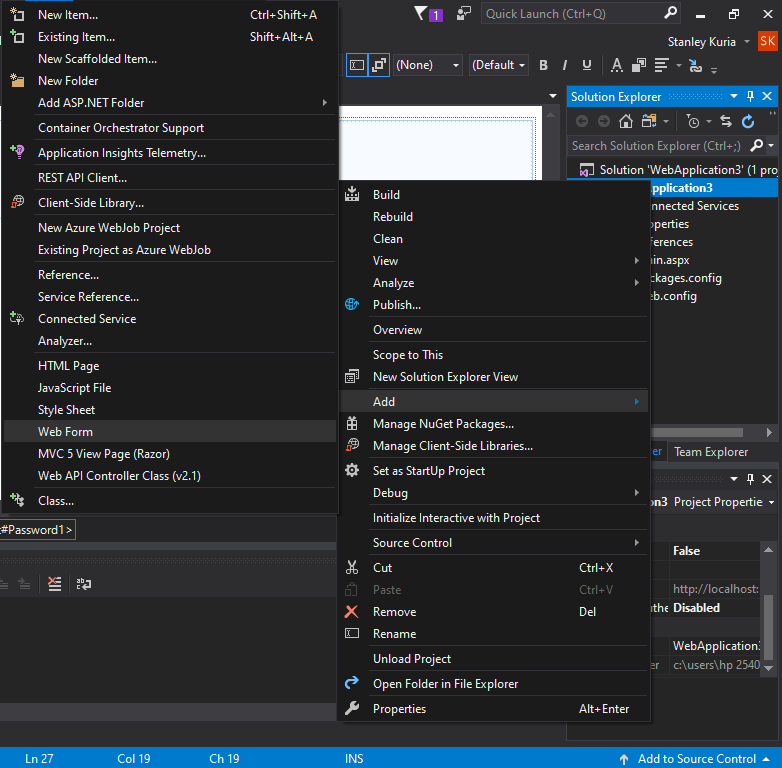
Right-click on the web application, and then click add. Select web form, rename the webform1 to Main and press enter.
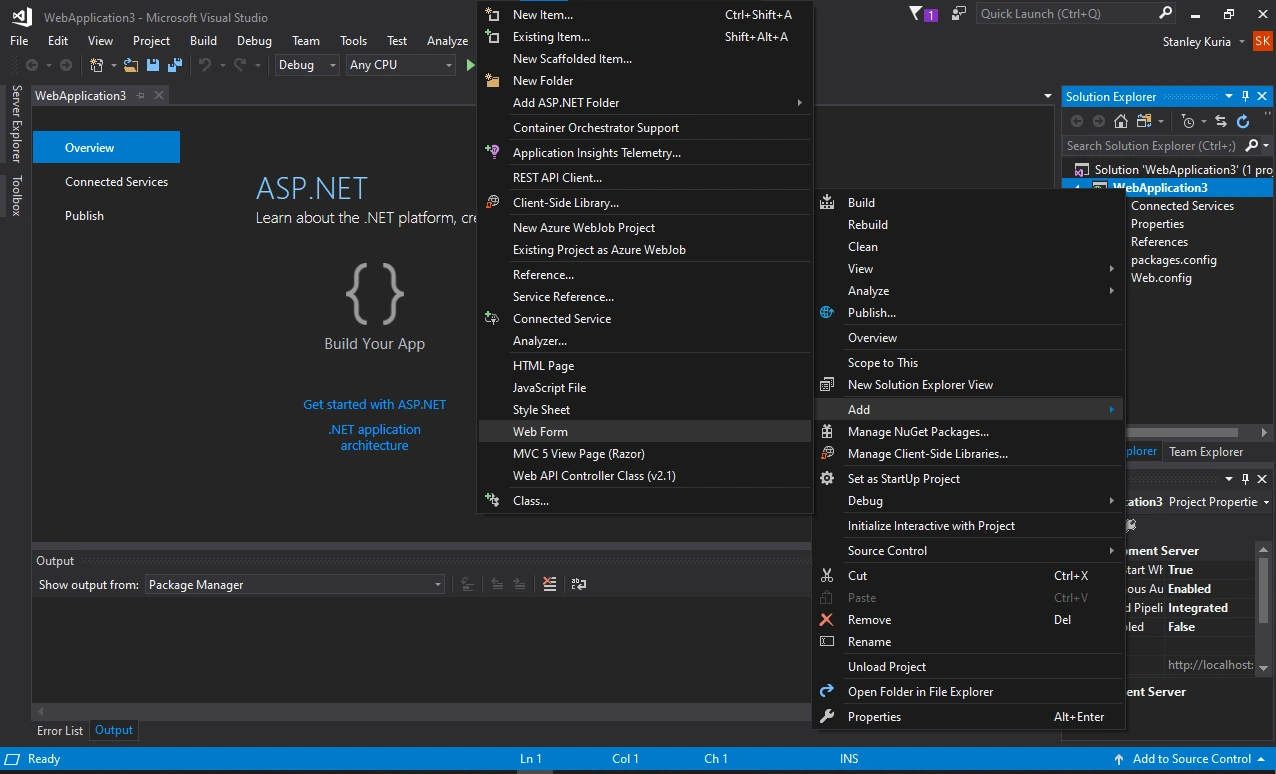
After right-clicking on the WebApplication on the IDE, a popup modal will be shown. We then click on the add button which launches another popup.
Step 4
Click design and select toolbox on the left corner of the IDE.
Drag and drop a label followed by a TextBox, rename the label as Username. Add another label and an input(password) box, rename the label as PIN.
Also, add a button and rename it as Submit. Then double-click the submit button to implement the design.
Your design should appear as follows:
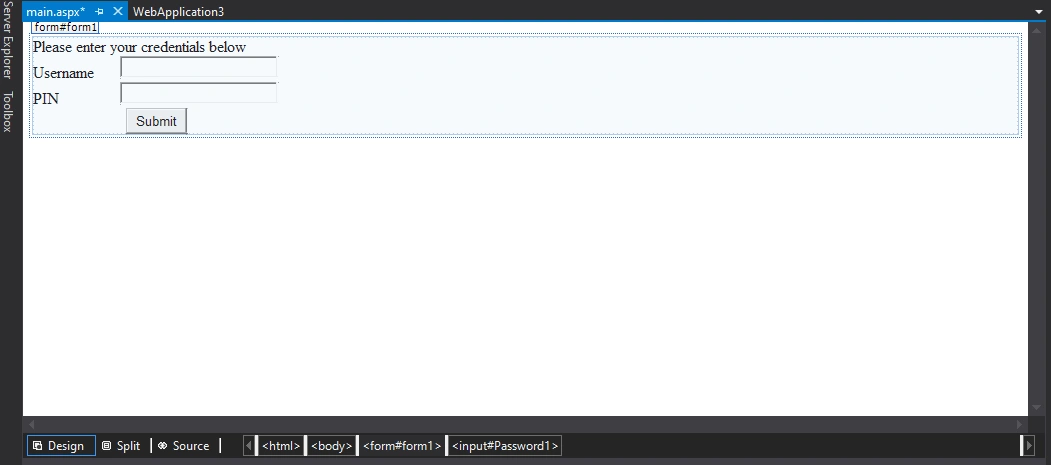
In the above image, there are two labels, Username and Pin, two text boxes, and a Submit button.
<%@ Page Language="C#" AutoEventWireup="true" CodeBehind="main.aspx.cs" Inherits="WebApplication3.main" %>
<!DOCTYPE html>
<html xmlns="http://www.w3.org/1999/xhtml">
<head runat="server">
<title></title>
<style type="text/css">
#Password1 {
width: 150px;
margin-left: 61px;
}
</style>
</head>
<body>
<form id="form1" runat="server">
<div>
Please enter your credentials below</div>
<asp:Label ID="Label1" runat="server" Text="Username"></asp:Label>
<asp:TextBox ID="TextBox1" runat="server" style="margin-left: 26px" Width="150px"></asp:TextBox>
<br />
<asp:Label ID="Label2" runat="server" Text="PIN"></asp:Label>
<input id="Password1" type="password" /><br />
<asp:Button ID="Button1" runat="server" style="margin-left: 93px" Text="Submit" />
</form>
<p>
</p>
</body>
</html>
Step 5
We need to create one more web form. Right-click on the web application, and add a web form. Rename the webform as recvd and click ok.
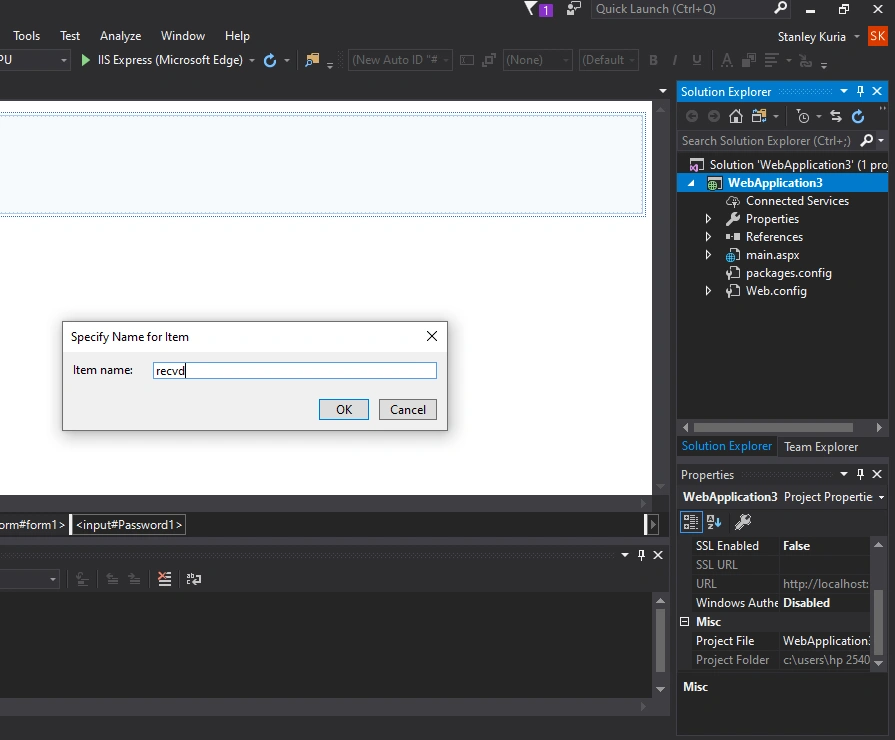
We renamed the new web form, as shown above.
Step 6
Go to Main.aspx.cs, and add the following code.
Session["Username"]= TextBox1.Text;
Response.Redirect("Recvd.aspx");
Session["PIN"]= Password;
Response.Redirect("recvd.aspx");
Your code should now appear as shown below:
using System;
using System.Linq;
using System.Collections.Generic;
using System.Web.UI.WebControls;
using System.Web;
using System.Web.UI;

namespace Session1
{
    public partial class Main: System.Web.UI.Page
    {
        public object Password1 { get; private set; }

        protected void Page_Load(object sender, EventArgs e)
        {

        }

        protected void Button1_Click(object sender, EventArgs e)
        {
            Session["name"] = TextBox1.Text;
            Response.Redirect("recvd.aspx");
            Session["PIN"] = Password;
            Response.Redirect("recvd.aspx");
        }
    }
}
Step 7
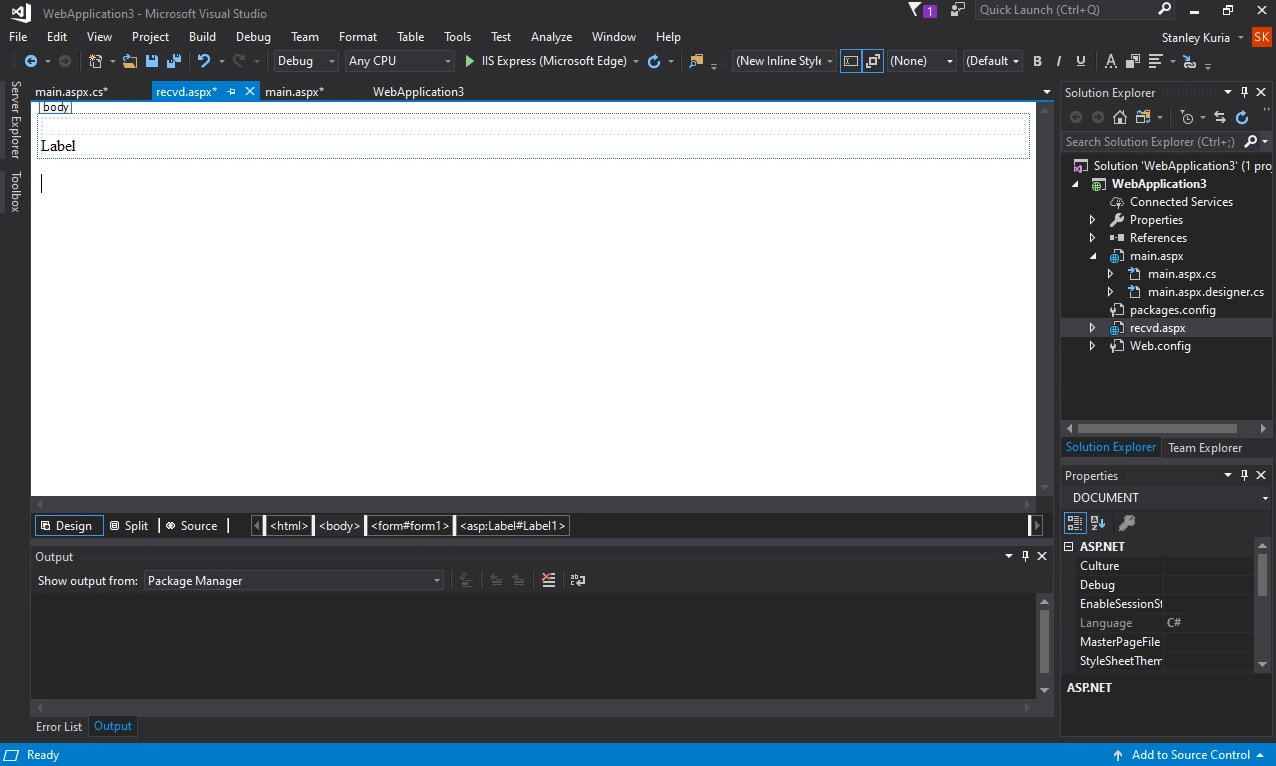
Click on recvd.aspx and select design. In the design tab, add a label.
Step 8
Right-click on recvd.aspx in the right corner and select view code. Add the code segment below:
 Label1.Text = Session["name"].ToString();
            TextBox = Session["Registration"];
The final code should look like this:.
using System;
using System.Web.UI;
using System.Linq;
using System.Web.UI.WebControls;
using System.Collections.Generic;
using System.Web;

namespace Session1
{
    public partial class recvd : System.Web.UI.Page
    {
        private object TextBox;

        protected void Page_Load(object sender, EventArgs e)
        {
            Label1.Text = Session["name"].ToString();
            TextBox = Session["PIN"];

        }
    }
}
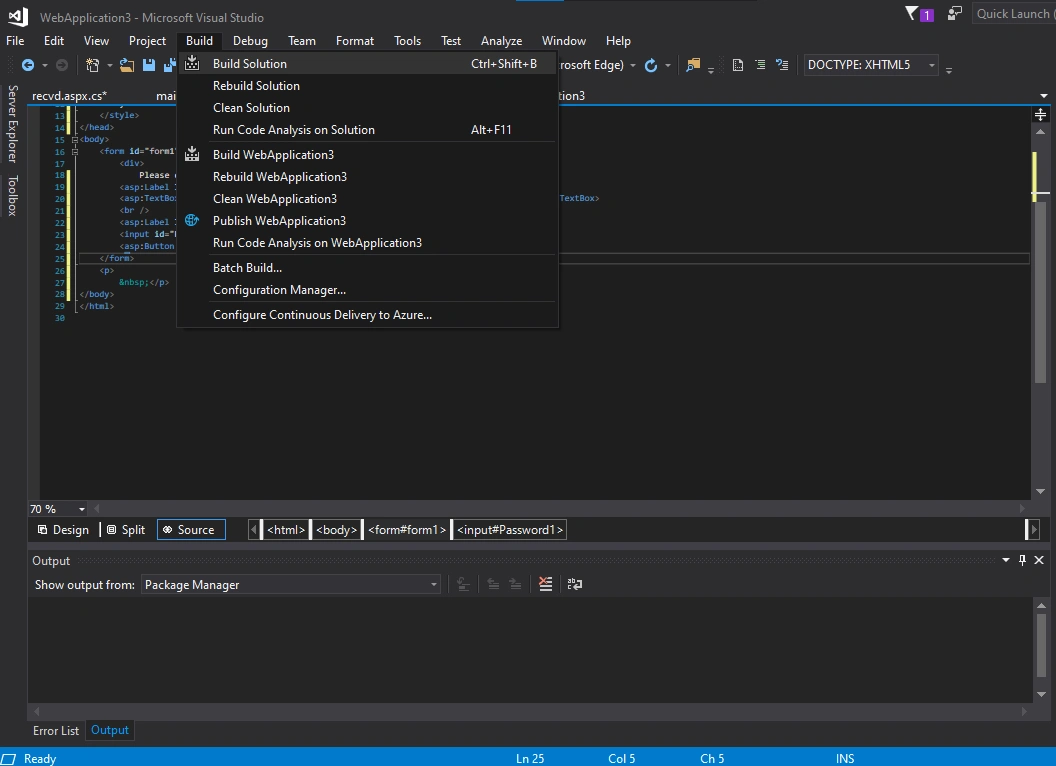
Step 9
Select main.aspx and build the application. After that, click debug and start without debugging to create a new session in a browser:
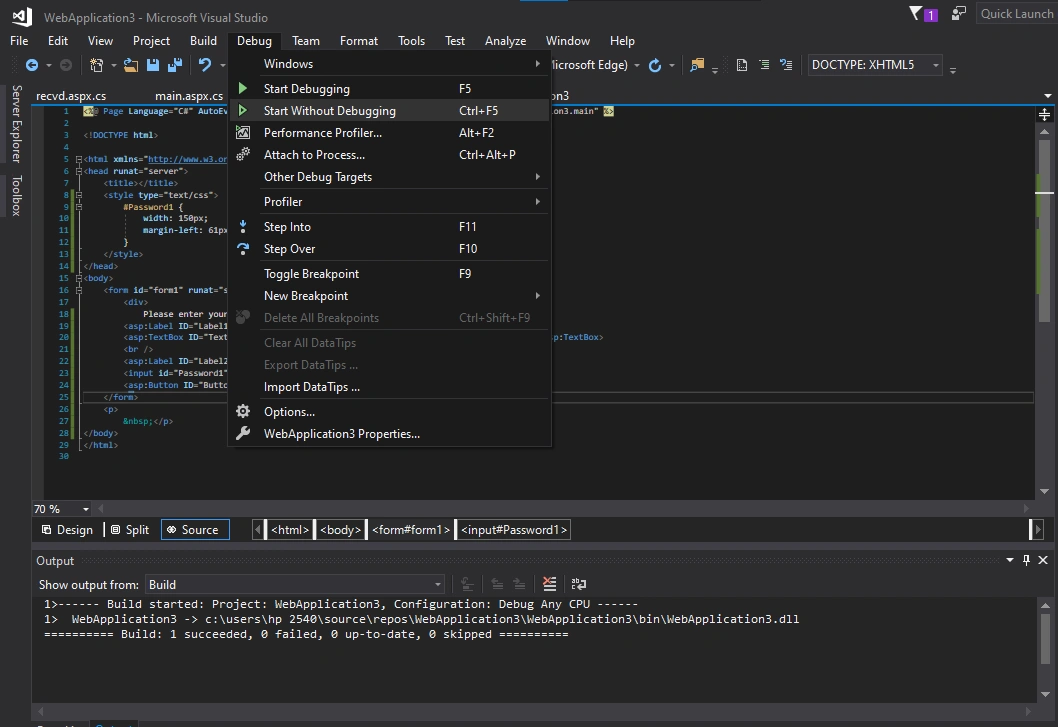

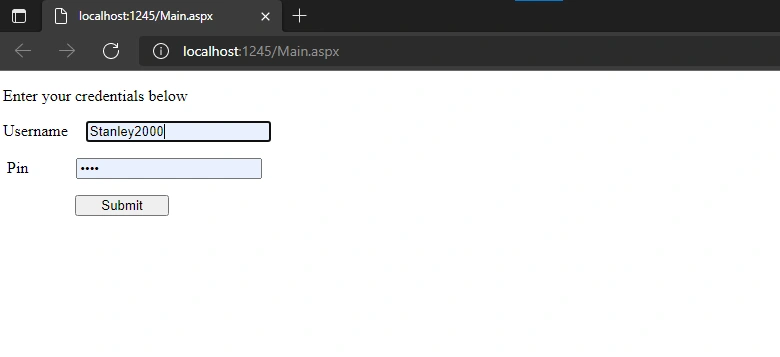
This is how our new web session will be displayed. Users can enter their usernames, emails, and passwords, then click submit to save the details in the web browser.
Conclusion
In this article, we learned how to create cookies, and implement sessions using the ASP.NET framework.
We also discussed the various cookies’ properties and how sessions are initiated and terminated.
Happy coding!


Comments: