


RabbitMQ is an open-source distributed message queue that supports many communication protocols. It is a message broker that receives messages from senders (producer) and forwards them to receivers (consumer).
These messages are maintained in a queue. A queue is a huge message buffer built upon the first-in, first-out(FIFO) principle. Many producers can submit messages to queues, and consumers can attempt to get messages from these queues.
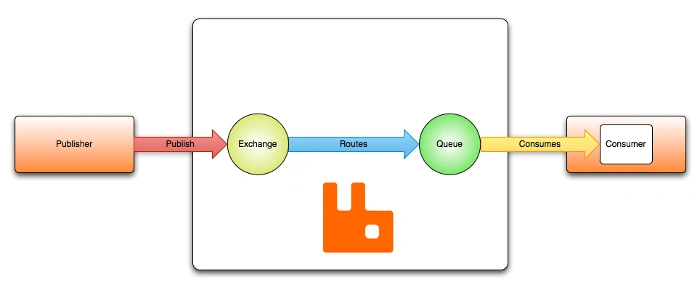
RabbitMQ architecture and essential components
RabbitMQ architecture is made up of a producer and consumer. As we said, the producer is the application or service which is sending messages.
The consumer is the application or service which will be receiving the messages. So instead of the producer calling consumer service directly, we set up another server that acts as the broker between the two. In this case, we will have a RabbitMQ server.
There are significant components that facilitate RabbitMQ message brokerage between the consumer and the producer. These are
- A producer (publisher) – an application or a service that publishes a message to a RabbitMQ server.
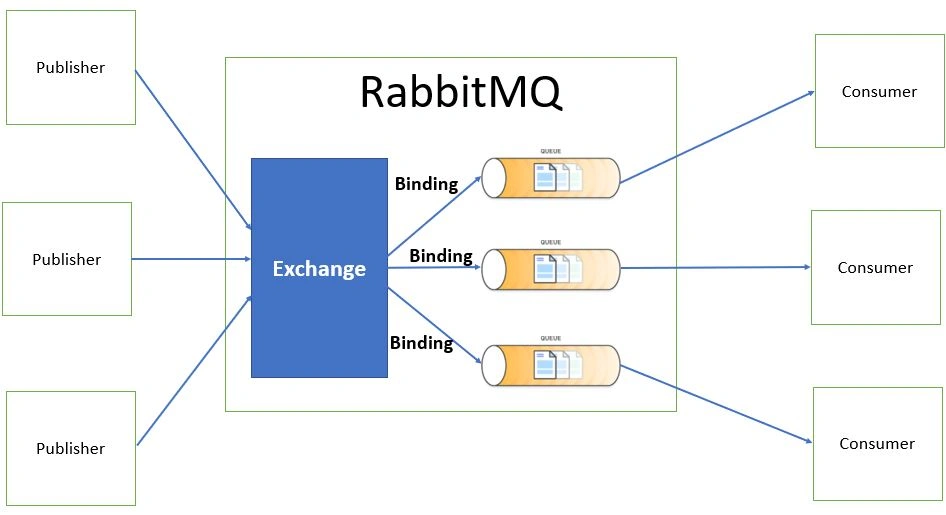
- Exchange – it acts as a message filter. It receives messages from producers and publishes them in queues using routing rules to send them to a consumer.
For example, take the case of the typical telephone Exchange for call routing. When the messages arrive at the telephone exchange, the Exchange determines the target consumer for a particular message and routes accordingly.
- Queue – a RabbitMQ buffer that stores published messages.
- Consumer – application or a service that reads messages from the RabbitMQ server queue.
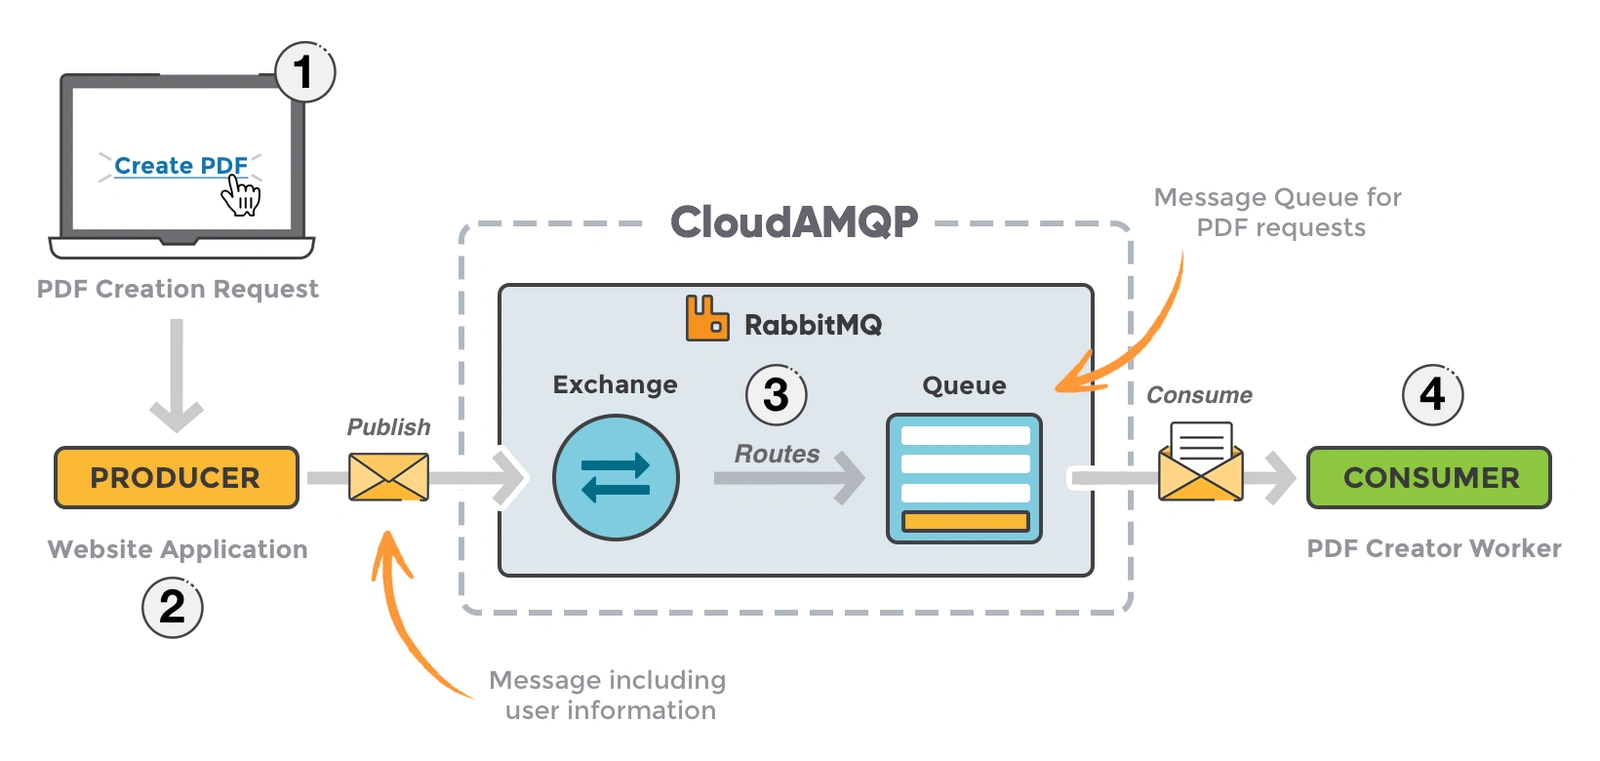
Here is a simple scenario of a user sending a request (message) to create a PDF web application (producer)
For the four components to effectively communicate, the following properties will be essential in determining the message destination.
- Message – This is the data or the information being exchanged by the producers and the consumers. Each message produced by a publisher had two main parts. That is;
- The message header – defines the message header attribute.
- The message body – the message content being shared.
Depending on the messaging sharing pattern, a message can have published, acknowledged, unacknowledged, redelivered, ready, and received properties.
- Routing Key – a RabbitMQ can have many message queues. In this case, each produced message needs to have a virtual address key that the exchange will use to determine which queue the message should be routed to. The virtual address is called the routing key.
- Binding (Binding key) – links the queue to an exchange. Exchange uses binding and routing keys to determine which message belongs to which queue.
- Exchange types – There are four messages Exchange type;
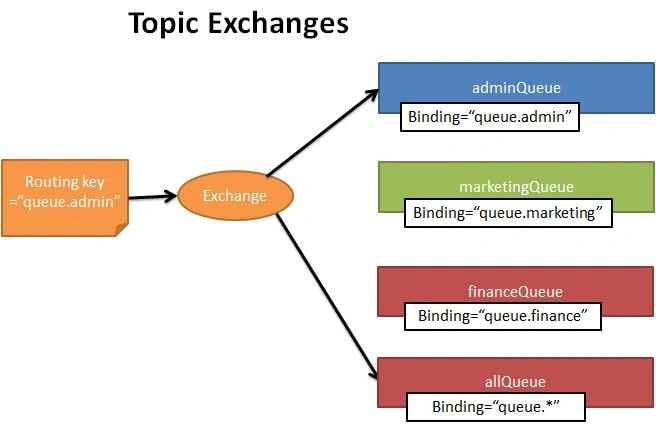
- Topic – route messages based on patterns in the routing key. For example, distribute data specific to a geographical location depending on another factor such as point of sale.
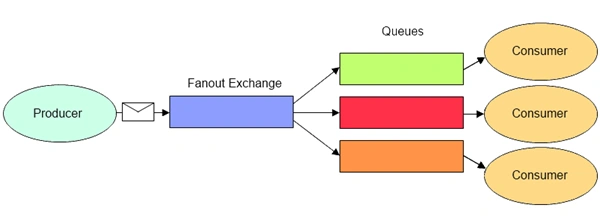
- Fanout – routes messages to all the queues bound to it, and the routing key is ignored. An excellent example of Fanout Exchange is a Group chat. RabbitMQ will use this scenario to distribute messages to the different participants of that specific group.
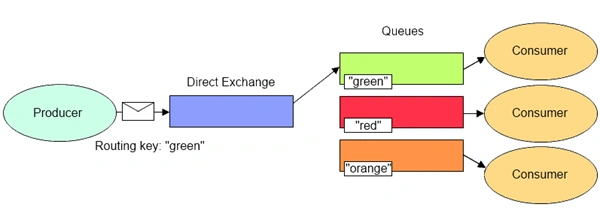
- Direct – delivers messages to queues based on a message routing key. The queue has to be the same as the routing key. It is applied when sending a message to individuals—for example, sending notifications to individuals in a specific geographical location.
- Headers – it ignores the routing key and looks at the headers that sent with the message.

How a RabbitMQ works
RabbitMQ is used as a message broker to implement advanced messaging queuing protocol (AMQP). A complete AMQP has three main components a broker, a consumer, and a producer.
When exchanging messages between the producers and the consumers, messages are not sent directly to Queues. They first pass through an exchange (in the broker) that redirects them to their destination Queues.
A producer will produce messages and then publish them in an exchange. Every message has its routing key.
Now the exchange ensures this message ends up in the correct queue. For the exchange to ensure the message is in the right Queues, it depends on several things, including the exchange type, which specifies the number of routing rules, routing keys, and header attributes.
Think of an exchange as a mail delivery person ensuring that the message ends up in the right boxes. In this case, he will need the right address to ensure the mail are in the correct hands.
In this example, routing rules, routing keys, and header attributes act as addresses for messages. RabbitMQ uses them as the bindings rules for the different exchange types to determine which message links to which queues depending on the queue binding key.
Once a message is in the right queue, a consumer can request the message he wants to consume.
In summary;
- A producer publishes messages to an exchange.
- A Binding rule (routing key) connects an exchange with a queue using the binding key.
- A consumer receives messages from the queue.
- A consumer sends a message back to the broker and informs the server it got the message. Thus the broker can delete that message from the queue.

Why do we need RabbitMQ (a message broker)
When you have a microservice application with service to services communication, i.e., service A and B communicating, service A will make a direct call to service B synchronously.
In a synchronous scenario service, A has to wait for service B to respond. If service B takes a long time to respond, this connection can potentially time out.
For a successful response, service A has to retry multiple times. In case service B died or crashed, communication is lost, and no messages are exchanged.
Service A only produces messages with a RabbitMQ server in place, and the RabbitMQ server will save them in a queue. So Whenever service A wants to reach out to service B, it does not directly send a message to service B.
Whenever service B wants to get the message sent by service A, it will go over to the queue and get this message. Since this message is published and saved, if B fails to get the message for the first time, it will retry and get it again since it is still available in the queue. The advantage of the message queues is that.
- One service is not directly dependent on another service.
- You can scale up the producer to produce more messages.
- You can scale up multiple consumers to access the messages directly from the queue.
- Adds resilience to your application. If one service fails, the other service will not be directly affected.
Set up RabbitMQ using docker containers
Now that we understand how RabbitMQ works and its importance, let’s set up a RabbitMQ server using Docker containers.
We will set up and start a simple RabbitMQ instance using Docker on our local computer along with the RabbitMQ management UI and basic Administrator functions.
I am assuming that you already have basic knowledge of Docker and how to use docker-compose. Also, ensure you have Docker installed on your local computer. You can download it here.
Finally, run docker version to check if Docker was successfully installed.
We will use docker compose.yml to set up a RabbitMQ instance. So go ahead and create a docker-compose.yml file in your desired directory.
- First, define the docker-compose version you want to run.
version: "3.8"
- Add the RabbitMQ service, the RabbitMQ properties and environment that you want your container to run in.
services:
  rabbitmq3:
- Set the container name.
container_name: "rabbitmq"
- Add the container image to pull from the Docker hub. There are different tags available for the RabbitMQ image.
Here we pull the image with the tag management because we want to access the RabbitMQ management UI. RabbitMQ management UI will enable us to manage RabbitMQ queues, channels, queues, and exchange.
image: rabbitmq:3-management
- Add RabbitMQ container environments. We are setting the RabbitMQ username and password that we will use to log in and access the RabbitMQ management UI.
environment:
    - RABBITMQ_DEFAULT_USER=myuser
    - RABBITMQ_DEFAULT_PASS=mypassword
- Define the container ports that will run on Docker and expose the container externally. This port will expose its container so that we can access it over a browser.
ports:
    # AMQP protocol port
    - '5672:5672'
    # HTTP management UI
    - '15672:15672'
Now your docker-compose.yml file is set to spin up this RabbitMQ instance with Docker containers.
version: "3.8"
services:
    rabbitmq3:
        container_name: "rabbitmq"
        image: rabbitmq:3.8-management-alpine
        environment:
            - RABBITMQ_DEFAULT_USER=myuser
            - RABBITMQ_DEFAULT_PASS=mypassword
        ports:
            # AMQP protocol port
            - '5672:5672'
            # HTTP management UI
            - '15672:15672'
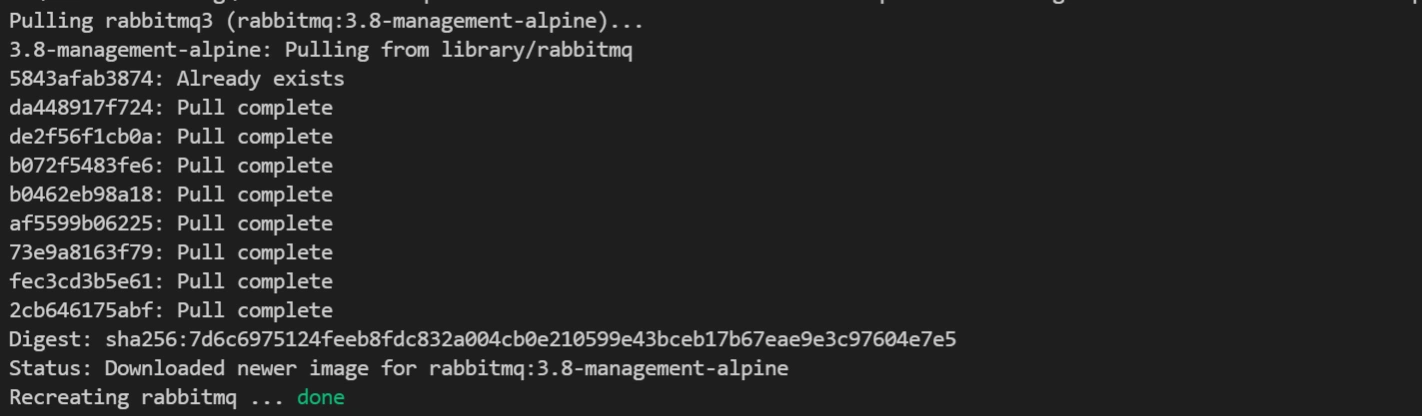
Let’s now test the compose file by running the command docker-compose up. Running docker-compose up will download and set up the Rabbit MQ container.
If you open your Docker engine, you will see the RbbitMQ container set and running.

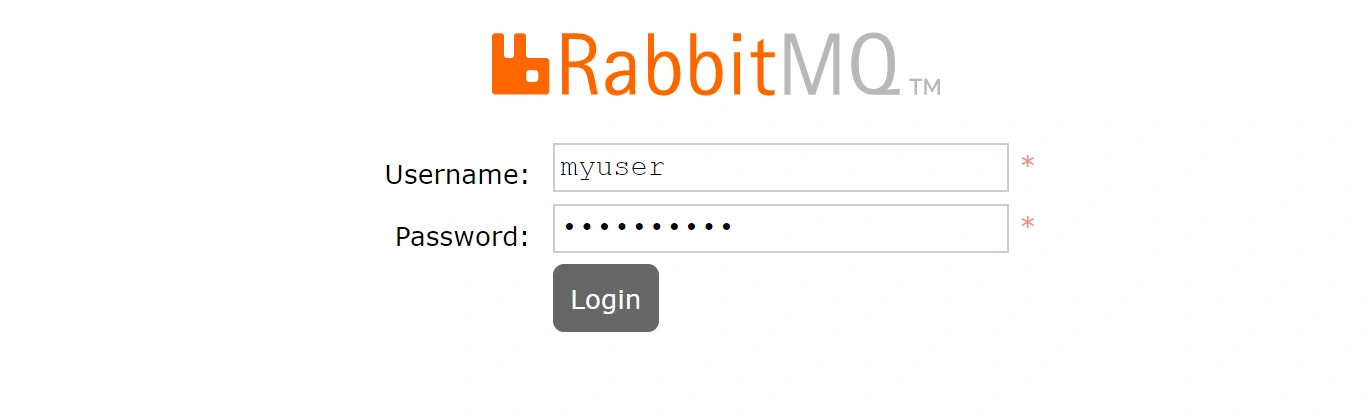
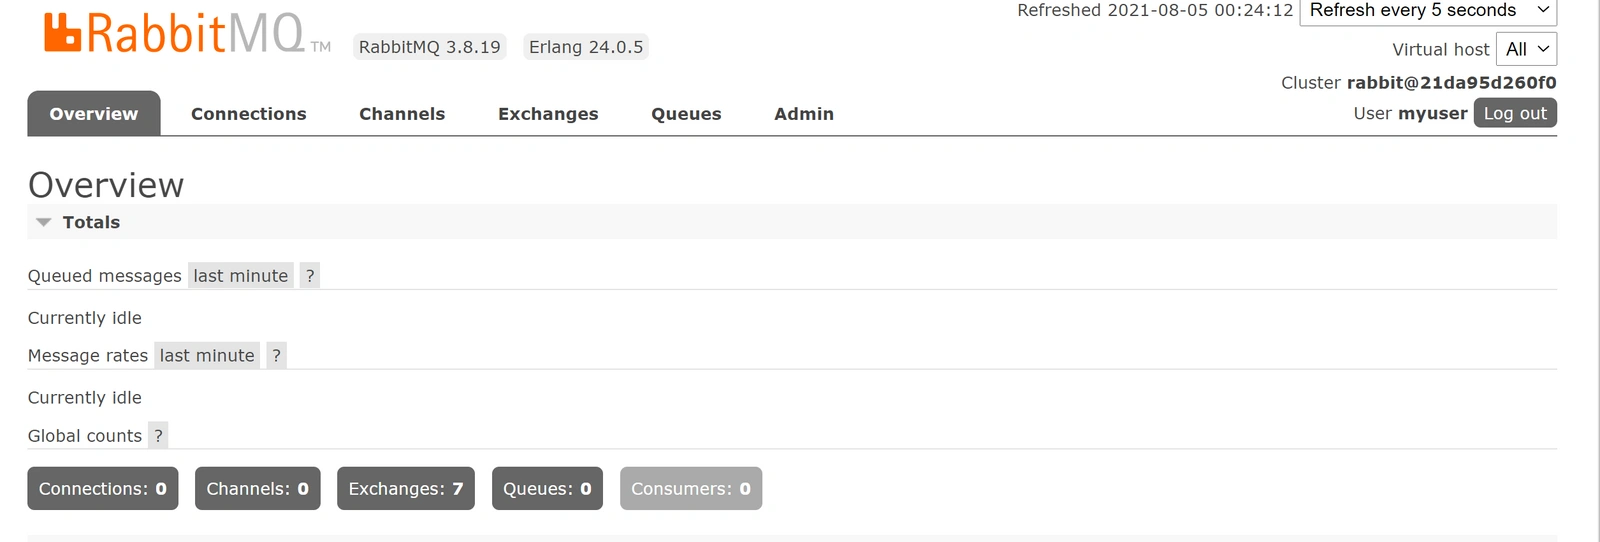
If you open http://localhost:15672/ on a browser, you will be able to access the management Ui, and now you can log in using the docker-compose set username and password.
And now you can see the RabbitMQ instance is up and running.
A simple test case
Now you can start adding queues and publishing messages. Let’s test that. Go to the tab queue and add a new queue; call it a test-queue.
On the exchange tab, add a new exchange call it test-exchange. Select exchange type as direct.

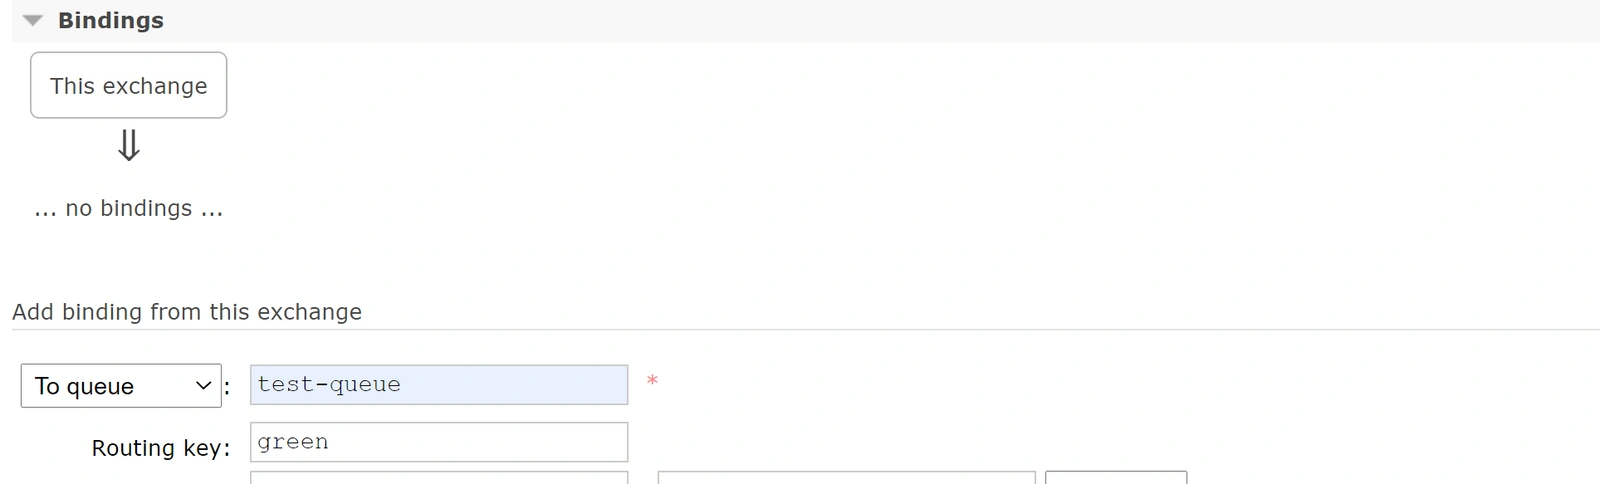
Click and open the added test-exchange.

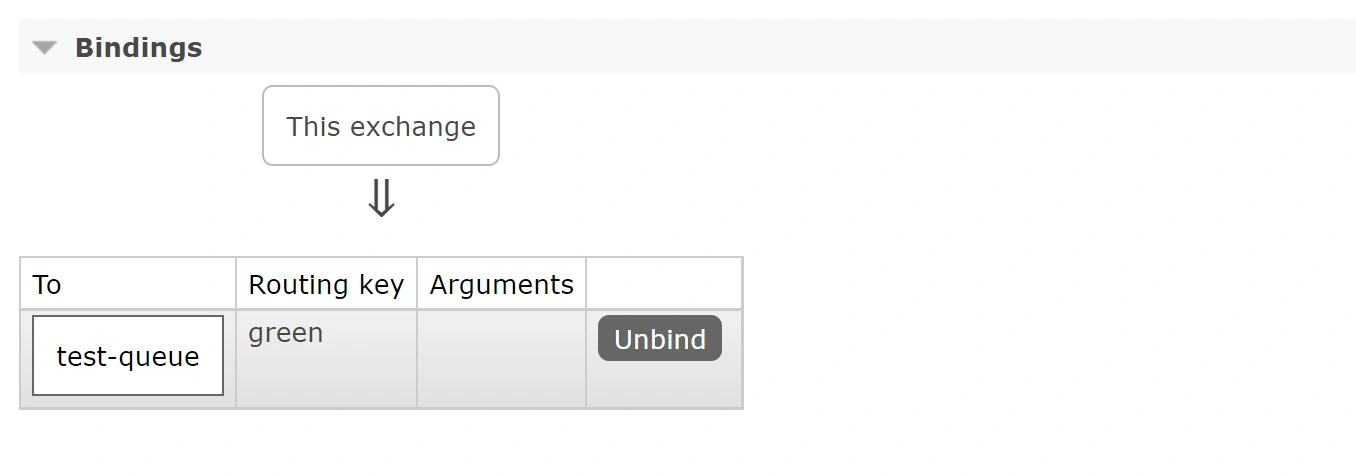
Now we will create a binding to the newly created queue. Scroll down and add binding from this exchange. Here we will add the name of the queue we have created. Also, add the routing key as green.
Let’s test this scenario by publishing a message to the test-exchange. Here we are testing the direct exchange use case. So on the publish message section, add the routing key as white and add a message at the Payload section.
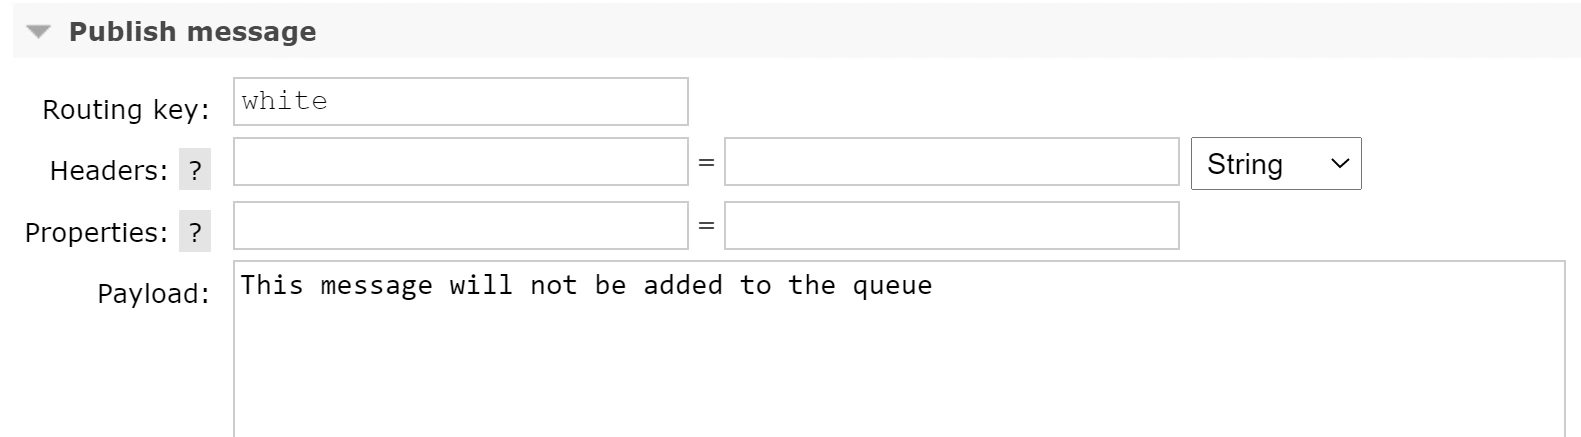
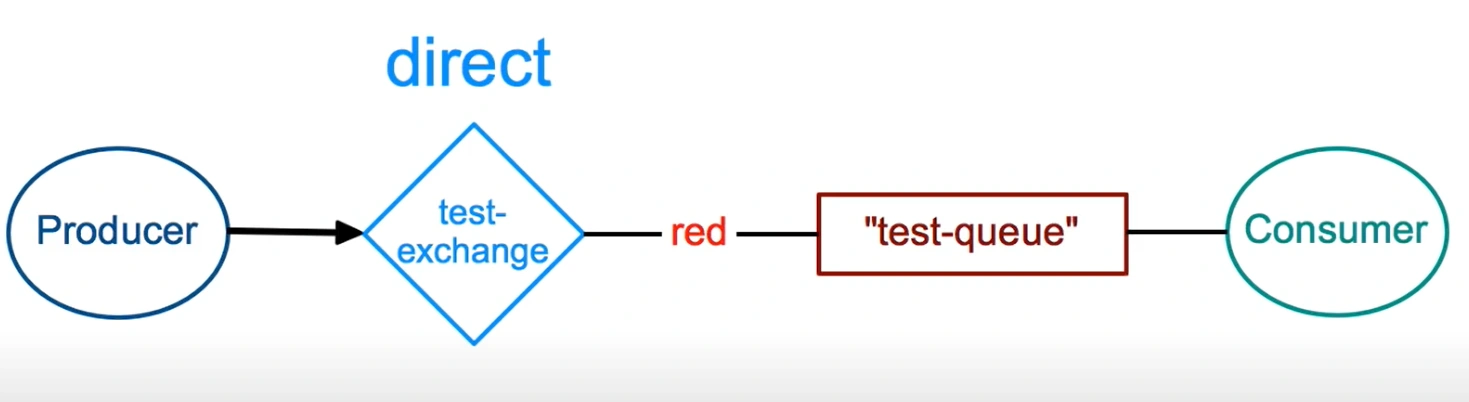
The Direct Exchange concept shows that messages are delivered to the queues based on a message routing key.
In this case, the test-queue is assigned messages with the green routing key. Using white as the routing key will result in this message not being routed to this queue. So, let’s try and publish this message with white as the routing key.
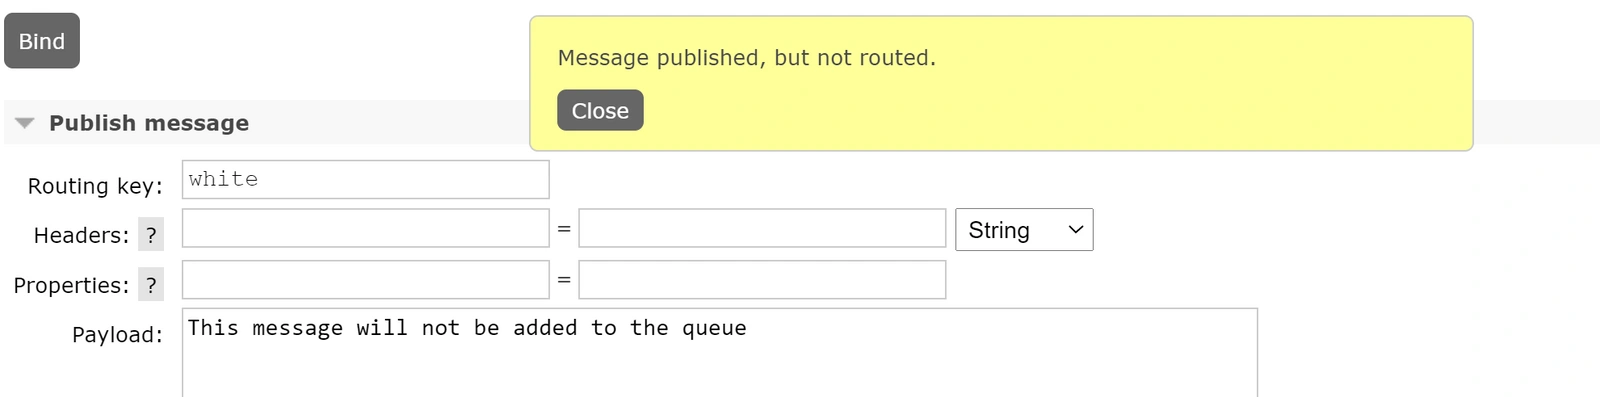
You can see that this message got published but not routed to the test-queue. Now try the same using green as the routing key.
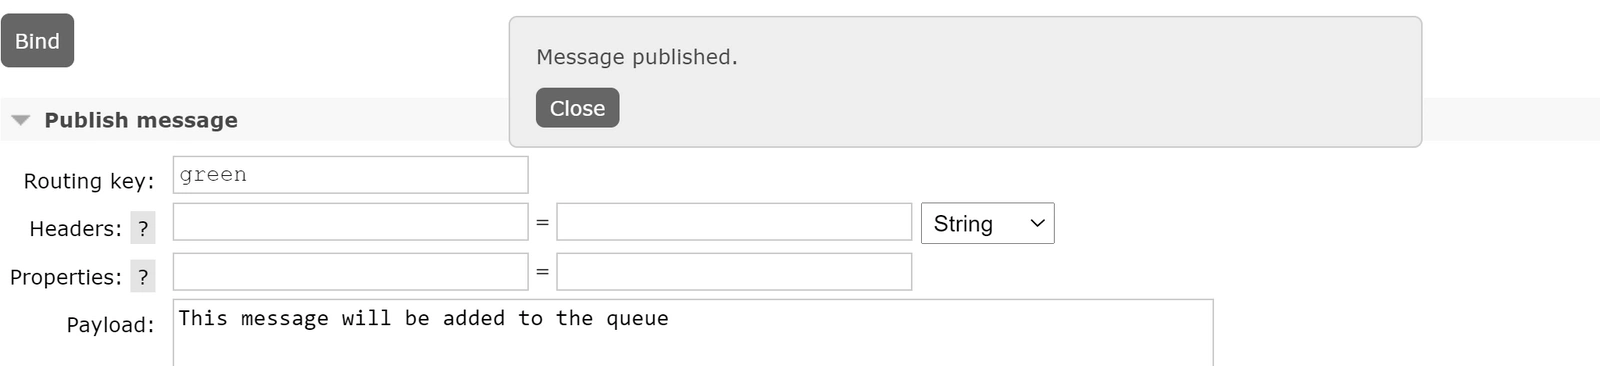
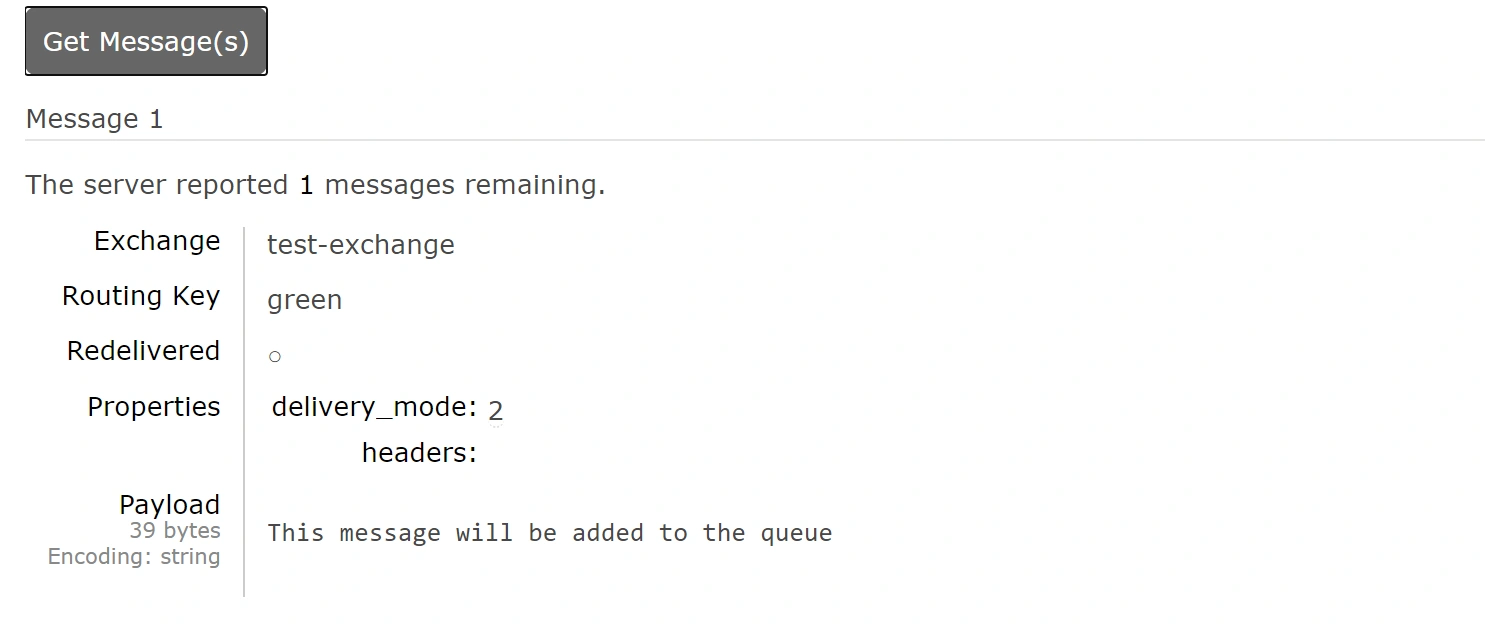
This message goes published and delivered to the test-queue. So if you head over to tab queue, select test-queue and click the get messages button, you can see the message routed to the queue.
Conclusion
We have discussed the basics of RabbitMQ.
RabbitMQ supports multiple programming languages, and you can use it to develop cross-language messaging applications. It supports popular languages such as Java, Javascript, Python, PHP, C and C++, Golang, and many more.
Go ahead and try to implement the concept of RabbitMQ using your programming language of choice.
Other messaging queues (brokers) that you can use and learn include Kafka, Redis, Beanstalk, and IBM MQ.


Comments: