


Graphical User Interfaces were introduced in reaction to the perceived steep learning curve of Command-Line Interfaces (CLIs). In this article, we will learn how to build a simple GUI using Java.
Java provides a rich set of libraries to create GUIs in a platform-independent way. GUIs offer a visual display of components. Components such as labels, text fields, buttons, checkbox, JPanel, JFrame on the screen.
Java’s original GUI library was called Abstract Window Toolkit (AWT). Later, it was replaced by Swing in Java SE 1.2. Since then, Swing has remained the primary Java GUI technology.
- Abstract Window Toolkit (AWT): AWT is a set of APIs used to create a GUI for Java applications. It was later replaced by Swing.
- Swing: Swing is a set of APIs containing GUI components used for creating Applications. Swing was built over AWT APIs. It provides a better and richer set of GUI components with native or cross-platform accessibility that makes the application look the same on different windows.
Goal
In this tutorial, we will learn how to design a simple user login page like this: 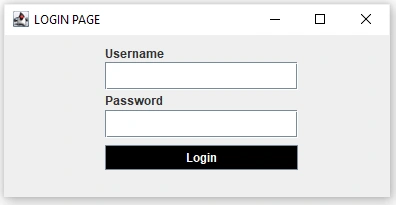
Prerequisites
- Basic understanding of Java and GUIs.
- Installed JDK version 16 or higher.
- Java compiler of your choice (Recommended: Eclipse)
Setup procedure
To create a project in Eclipse:
- Open Eclipse IDE
- Click on
File - Select
New - Select
Class - Finally, name your class.
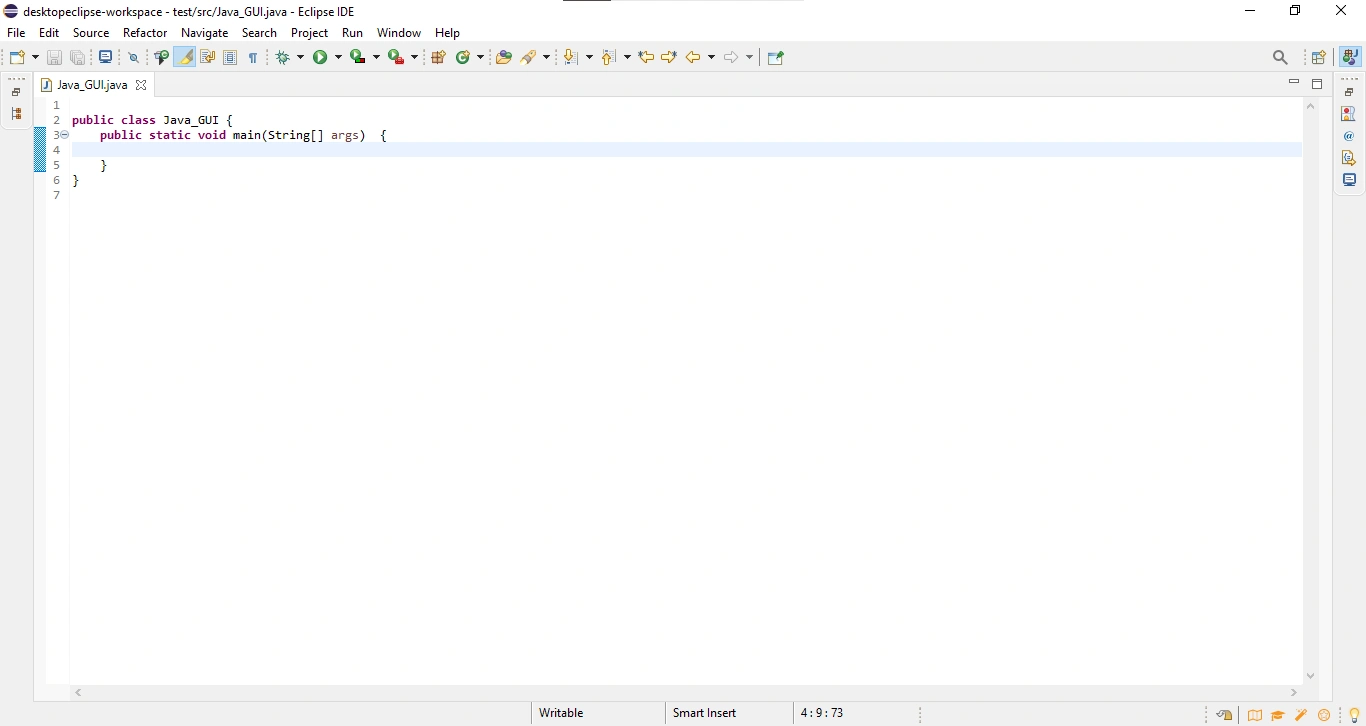
Once you have set up, your workspace should look like this:
To familiarize yourself with Eclipse, it is recommended to read this article.
Core concepts
Variables
Variables are containers that hold valid values of any data type.
There are three types of variables in Java:
- Local Variables: declared inside a method class and can only be accessed by the method.
- Instance Variables: declared within a class, outside of a method, and can be accessed by an object of a class.
- Static Variables: declared using a static keyword within a class, outside of a method, and can be accessed by different objects of a class.
Variables also hold GUI components like labels, checkboxes, text fields, frames, panels, and buttons.
Example:
// declaring a button variable
button = new JButton("Login");
In the example above, we declared a button as the variable name, JButton as the name of the class that holds the button component in the AWT package, and Login as the text that appears on the button.
JPanel
JPanel class covers the entire space or a window where we attach the component to visualize it along with other panels.
JFrame
A Frame is a top-level window with a title and a border. The size of the frame includes any area designated for the border.
Frame encapsulates a window. It contains a title bar, menu bar, borders, and resizing corners.
JLabels
A display area for a short text string or an image, or both. A label provides a keyboard alternative as a convenience for a nearby component.
JTextfield
JTextField is a lightweight component that allows the editing a single line of text.
Note that, password text fields do not show the original characters. The English characters will be replaced by any other special character.
Creating UI
Having understood a little about various Java GUI components. Let’s start building the login page.
To begin with, we import the Java GUI packages:
import javax.swing.*;
import java.awt.*;
import java.awt.event;
Variables
Next, we create a class Java_GUI containing private static variables as shown below:
// Class Variables
public class Java_GUI implements ActionListener {
	private static JLabel password1, label;
	private static JTextField username;
	private static JButton button;
	private static JPasswordField Password;
Note: We implement an ActionListener that listens to an event. The ActionListener class can be found in
java.awt.eventpackage. It has only one methodactionPerformed().
Here, the action is attached to a button. The action event is triggered on the button click.
Adding JPanel to the window
Next, we construct a JPanel container which will help in laying out components on the window.
Before we use JPanel, we have to create and instantiate the object as shown:
// creating a JPanel class
JPanel panel = new JPanel();
panel.setLayout(null);
From the snippet above, we instantiate a JPanel class using the variable name as a panel. Then, we set the layout to be a null value, meaning: the layout should take the entire width and height of the screen.
Adding JFrame
Next, let’s create a JFrame class that contains all the components that we see on the screen:
// JFrame class
JFrame frame = new JFrame();
frame.setTitle("LOGIN PAGE");
frame.setLocation(new Point(500, 300));
frame.add(panel);
frame.setSize(new Dimension(400, 200));
frame.setDefaultCloseOperation(JFrame.EXIT_ON_CLOSE);
Line 1: Declaring and instantiating JFrame class Line 2: Setting JFrame title name that will appear at the top of our frame. Line 3: Positioning frame on the window, 500pixel from the left, 300pixel from the top of the screen. Line 4: Declares the frame on the panel. Line 5: Setting the size of the entire frame – 400 pixels wide (width) and 200 pixels long (height). Line 6: This will end and close the process whenever we exit the window.
Adding username label
Next, we instantiate the username label and position. It is set at 100 pixels from the left of the frame, 8 pixels from the top of the frame, with 70 pixels as its width, and 20 pixels as its height.
// Username label constructor
label = new JLabel("Username");
label.setBounds(100, 8, 70, 20);
panel.add(label);
Adding a username text field
Next, we instantiate the username textfield with position – 100 pixels form the left, 27 pixels from the top, 193 pixels as width, and 28 pixels as height.
// Username TextField constructor
username = new JTextField();
username.setBounds(100, 27, 193, 28);
panel.add(username);
Adding password label
Let’s position the password label at 100 pixels from the left, 55 pixels from the top, 70 pixels wide (width), and 20 pixels long (height).
// Password Label constructor
password1 = new JLabel("Password");
password1.setBounds(100, 55, 70, 20);
panel.add(password1);
Adding password text field
Next, the password text field is positioned at 100 pixels from the left, 75 pixels from the top, 193 pixels wide (width), and 28 pixels long (height).
// Password TextField
Password = new JPasswordField();
Password.setBounds(100, 75, 193, 28);
panel.add(Password);
Adding button
Finally, we’ll add a button Login to perform authentication before we login.
// Button constructor
button = new JButton("Login");
button.setBounds(100, 110, 90, 25);
button.setForeground(Color.WHITE);
button.setBackground(Color.BLACK);
button.addActionListener((ActionListener) new Java_GUI());
panel.add(button);
Line 5: This will invoke an action on a button click.
Authentication
This method will be invoked when we click on the Login button. It helps authenticate the data entered in the username and password fields.
// Imlementing an action event listener class with conditional statement
@Override
public void actionPerformed(ActionEvent e) {
	String Username = username.getText();
	String Password1 = Password.getText();

	if (Username.equals("section.io") && Password1.equals("123"))
		JOptionPane.showMessageDialog(null, "Login Successful");
	else
		JOptionPane.showMessageDialog(null, "Username or Password mismatch ");
}
Here, we check if the username is section.io, and the password is 123. To perform better validations, we must use Regular Expressions (REGEX).
JOptionPane is another component of Java GUI, it comes in handy when displaying either a warning, success, or error message on the screen, as a dialog box.
Conclusion
So far, we have learned how to design a simple user login page from scratch with the help of Java GUI packages.
We also learned how to create an authentication method that displays a message dialogbox using JOptionPane.showMessageDialog(); class.
Happy coding.
To learn more about this topic, it is recommended to read this documentation.


Comments: