


To Dual boot a machine is to have two operating systems installed on the same machine. Take for instance being able to access both Kali Linux and Windows on the same machine. This way, you can choose to operate on either of them during the booting process.
Reasons for installing Kali Linux alongside Windows
- Kali Linux is primarily developed for Security purposes. This limits Kali Linux’s support for some integrated development environments. For instance, as a developer, you might not comfortably use Android Studio on Kali Linux as compared to Windows.
- On the other hand, windows can not be used for security research since it does not support major security tools used for research purposes. This limits its implementation in security researches and management.
To solve these two problems, you need to install both Kali Linux and Windows on the same machine. To do so without losing any of your data, carefully follow the procedure given below.
Objectives
In this article, we will learn how to set up Kali Linux on a machine that has windows operating system installed. This process allows you to safely keep your data.
Note: This process is similar to any other Linux-based operating system.
Prerequisites
For a successful setup, you need the following:
- An 8GB or higher pen drive.
- Secondary storage eg. a Hard disk of not less than 25GB.
- Windows OS running on your machine.
Getting started
Download the files required during the process:
Downloading Kali Linux Iso image
Navigate to the Kali Linux official site and download the latest version of Kali Linux.
Creating a bootable pen drive
We will first download the software used to make a pen drive bootable.
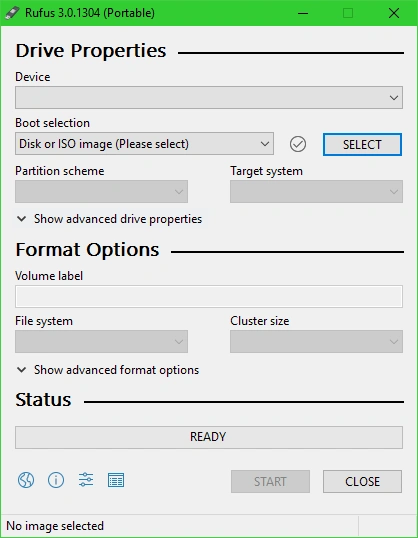
We will use Rufus in this context. Why Rufus?
Rufus is a super-fast, lightweight, and error-free software. It also supports multiple platforms such as Kali Linux and Windows operating systems.
You can download Rufus here.
Open Rufus and insert the pen drive onto your machine.
Select the appropriate options depending on the pen drive and the OS you want to install.
Ensure that the pen drive is empty since the process will wipe out any data in the disk.
Carefully select the options appropriately to avoid any errors at any point.
Patiently wait as the process might take a while depending on your pen drive.
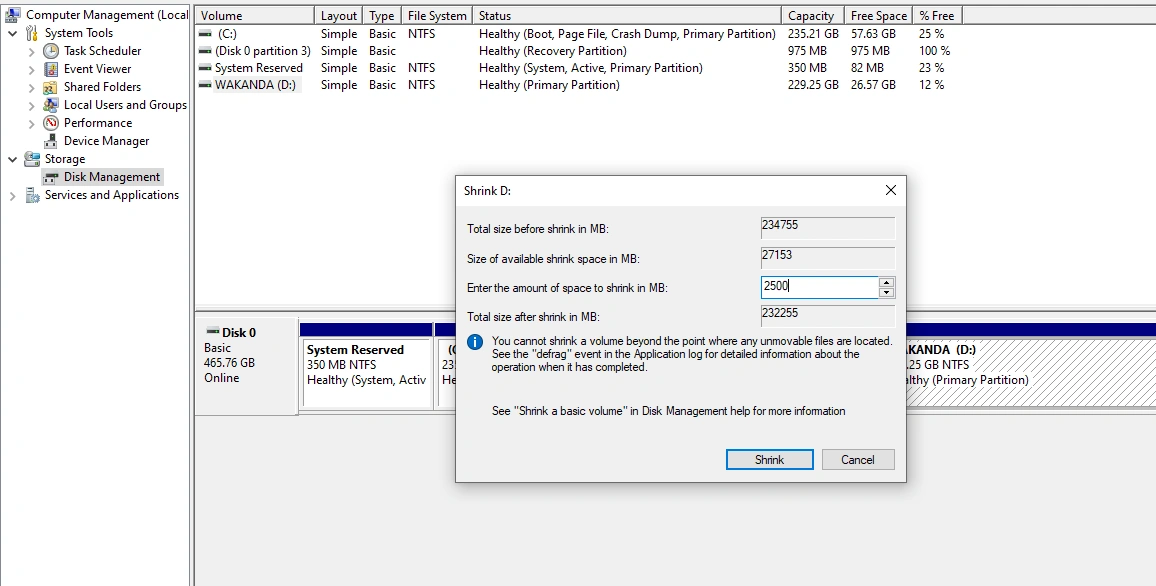
Creating space for Kali Linux
On your Windows machine, navigate to the disk management options by searching computer management on the search bar. Select the primary disk where Windows OS is located.
Right-click and allocate the amount of space suitable for Kali Linux. The partition should appear as shown below:
Installing Kali Linux
After successfully shrinking the space, install Kali Linux on the machine as follows:
Reboot your machine and access the boot menu. You can access the boot menu by either clicking the esc, f2, f10, or f12 keys depending on the architecture of your machine. Follow the directives from the manufacturer for more information.
Select the pen drive listed on the menu to boot your PC from it.
Choose the options as guided below to avoid any errors and to have an assured successful installation:
- Select Graphical Installation – This will allow you to follow through the installation process via the Graphical User Interface (GUI).
- Choose your prefered Language – In my case,
English. - Select your Region and the preferred Keyboard lab.
Wait for the installation set-up to load all components. This should take a short while.
In the following setup, we’ll use the recommended choices for an assured successful set-up:
- Load missing firmware from removable media? – choose
No. - Connect to your WiFi card if one is available – this is optional.
In case you decided to connect to a WiFi or internet, wait for the set-up to configure all the Networks. This process is also quick.
Moving on, create a primary user for Kali Linux:
- Set the
Host nameandDomain nameas you wish – This is an optional step. The hostname is the identifier allocated to the device when connected to a network while the domain name is the physical address of the device. It is the easily recognized part of the IP address. - Enter your
usernameand press enter key. - Type in the
passwordand confirm the entry.
Note: Remember your
usernameandpasswordas they are case sensitive and required in every login session.
Creating disk partitions
Since we have already created space for Kali Linux, we will do this manually:
- Select the
manualoption – This will display a list of all the drives on the PC. - Choose the drive with
free space– This is the space we created earlier. We’ll further create two partitions from the available free space.
One of the partitions will be the root partition for Kali Linux and the other will be the swap area.
First, let’s create a root partition – This is where the Kali Linux OS will be installed.
Choose the free space option and select the options as shown below:
- Select create a new partition option.
- From the free space, allocate 95% to the root partition.
- Select the location for the new partition as the beginning of the drive.
- Choose the File system as Ext4 journaling.
- Mounting Point / – the root file system.
TIP: Click done setting up the partition before proceeding. Otherwise, you will have to start the partitioning process over again.
Creating a swap partition
Swap area access virtual RAM if the system has less amount of physical memory. If your machine has 16GB of RAM or more, there is no need to create a swap partition.
Do the following to create a swap partition:
- Select the options same as creating a root partition discussed above.
- Select the
swap areaoption as the use of the partition. - Remember to select
donewhen you have made all the selections.
We have crated a partition!
Click Finish partitioning and write changes to disk then hit the continue button.
On the write changes to disk option, select Yes and wait for the installer set-up to install the base system.
Software selection
You have to choose a desktop environment. A desktop environment is the general outlook of the OS after you have logged in.
It contains the folders, toolbars and even icons. Take the desktop environment as the general outlook of your Kali Linux.
Three major desktop environments
Xfce– This is the default and commonly used desktop environment. It is fast, lightweight, and appealing to users.KDE– This desktop environment provides functions and application software to perform basic daily tasks. It has tools that allow collaborative work hence known as a central development hub.GNOME– This desktop environment provides simplicity and ease of use for Kali Linux. It was developed with the intent to make Kali Linux user-friendly for non-programmers.
In this case, we’ll choose the Xfce environment.
Lastly, click continue without altering other changes and wait for the process finish. This might take a while.
When the installation process is complete, restart your computer and eject the flash disk.
What happens after rebooting?
After rebooting, Kali Linux will load into GRUB boot loader. This is where you’re given the option of the OS you want to boot. For our instance, it’s either Kali Linux or Windows. Select Kali Linux.
The login screen will pop up a login window as shown:
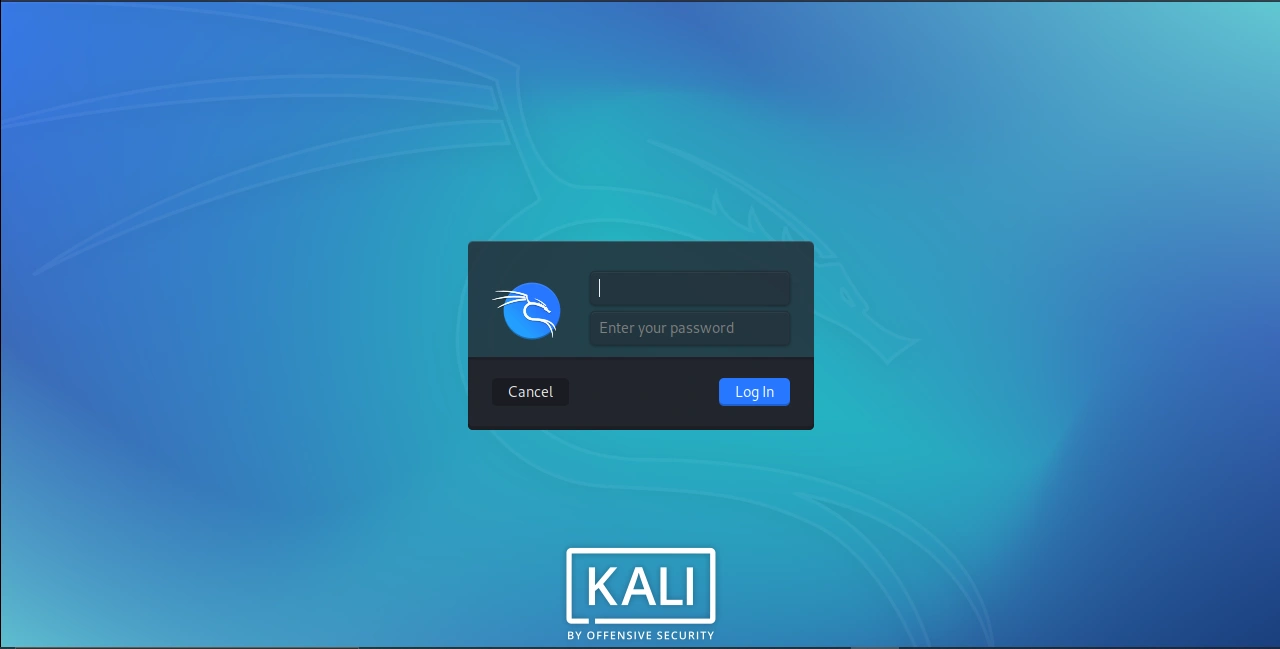
Enter your login credentials to proceed, that is, your username and password.
After a successful installation you’ll be able to access Kali Linux home screen on your machine. If it is your first time using Kali Linux, feel free to go through this article for more information.
Conclusion
In this article, we have learned:
- Why dual-boot is important.
- The process of creating a bootable flash drive.
- How to create space to set up your OS.
- How to install and create a user in Kali Linux.
Enjoy your Kali Linux journey!


Comments: