


License plate detection is identifying the part of the car that is predicted to be the number plate. Recognition is identifying the values that make up the license plate.
License plate detection and recognition is the technology that uses computer vision to detect and recognize a license plate from an input image of a car.
This technology applies in many areas. On roads, it is used to identify the cars that are breaking the traffic rules. In security, it is used to capture the license plates of the vehicles getting into and out of certain premises. In parking lots, it is used to capture the license plates of the cars being parked. The list of its applications goes on and on.
Introduction
Python gives us the ability to create our license plate detection and recognition program. We achieve this by using three of its libraries; pytesseract, imutils, and OpenCv.
In this tutorial, we are going to learn the processes software passes to detect and recognize a number plate, how to use the three libraries we did mention above to create our program, and finally how to create a program that is capable of detecting and recognizing a license plate. We will use the pycharm community edition as our IDE since it is freely available on the internet. A person using Windows or Linux can follow through.
Prerequisites
To follow through this tutorial, the reader needs to:
- Be familiar with the python programming language
- Have pycharm installed on their computer. You can download pycharm community edition here.
Processes a software undergoes to detect and recognize a license plate
For software to detect and recognize a license plate, it undergoes three major processes.
- Taking an image of a car as input – The program takes in the input of the car in which the license plate is to be detected.
- Processing the input – The image taken as the input undergoes processing to detect the part of the car that is the license plate.
- Recognizing the number plate – The values of the detected license plate are extracted from the number plate image.
Creating a license plate detection and recognition program
First things first, let’s prepare our workspace. Open pycharm and click on create a new project as shown in the following screenshot. 
On the window that appears next, click on create.
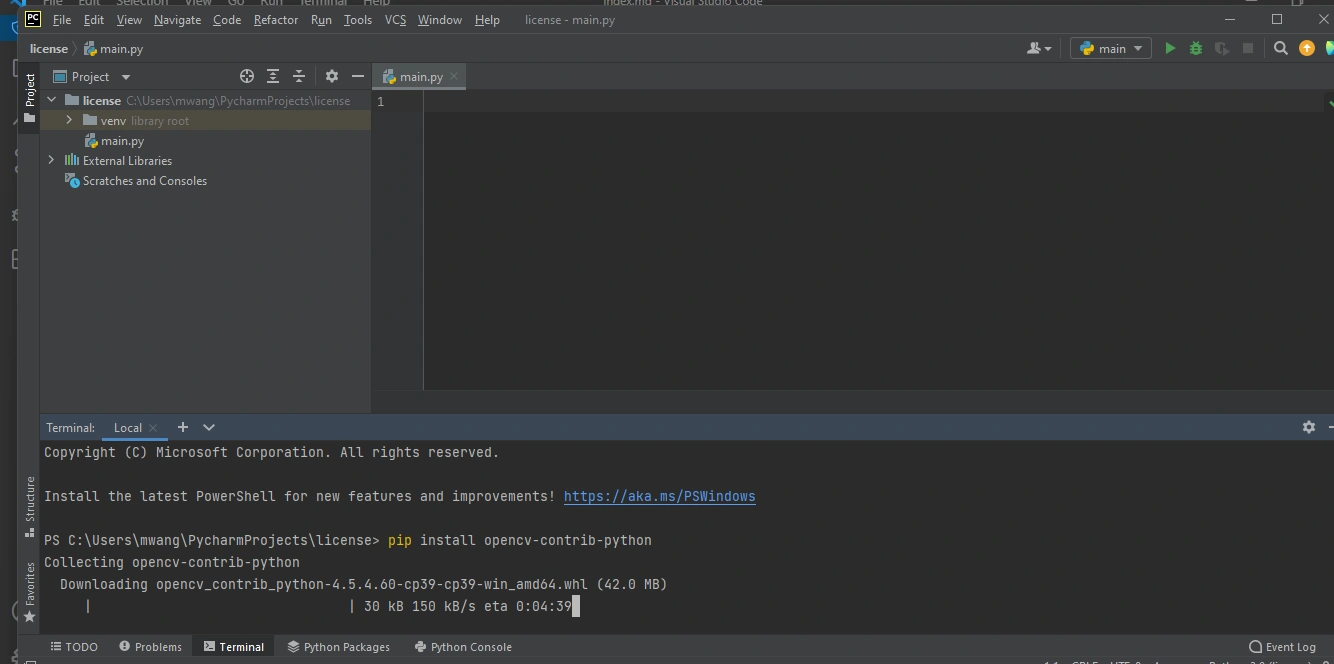
We now need to install the python libraries we will need to create our program. To achieve this, open the terminal and type the following command then hit enter:
pip install opencv-contrib-python
Wait for a few seconds till it is installed successfully. We also refer to this library as cv2. We will use it to preprocess our image and also display the images that have undergone processing.
The screenshot below shows how to install cv2 from the terminal.
We will follow the same steps to install the other two libraries. We will only change the command part.
To install imutils use the following command:
pip install imutils
We will need this library to resize our images.
To install pytesseract use the following command:
pip install pytesseract
We will need this library to extract the license plate text from the detected license plate.
We now need one more thing which is the tesseract. This is software that pytesseract will use to recognize characters from an image.
Installing tesseract
Download tesseract from here and install it.
The image we will detect and recognize the license plate from
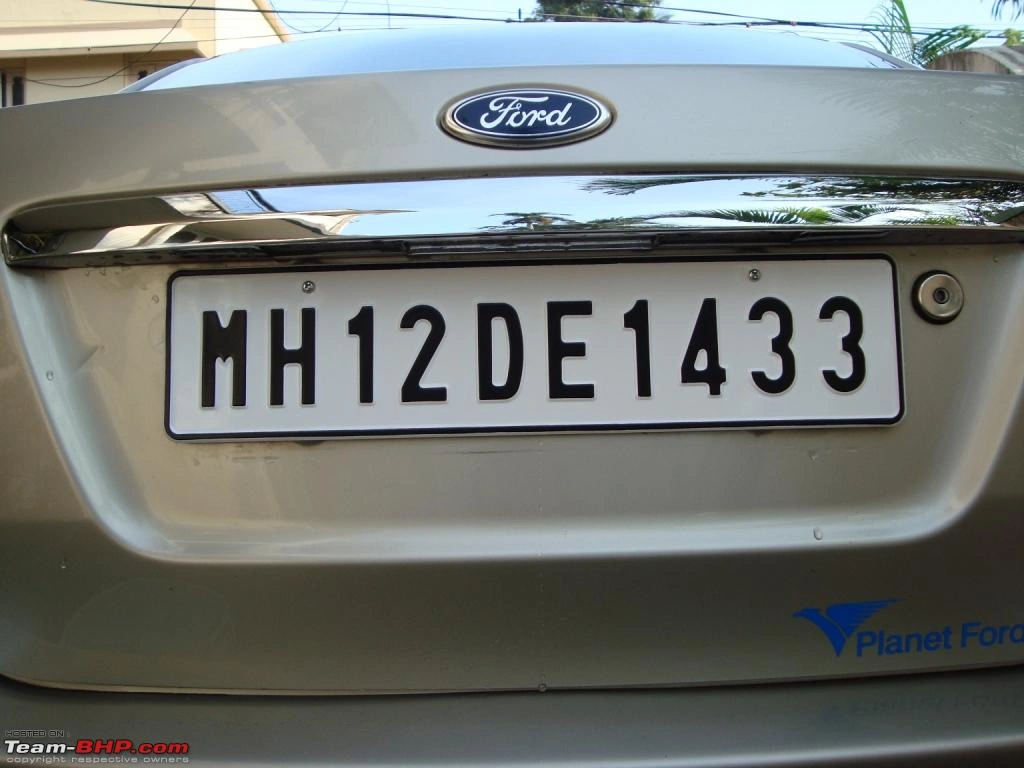
We will use the above image as an input for our program.
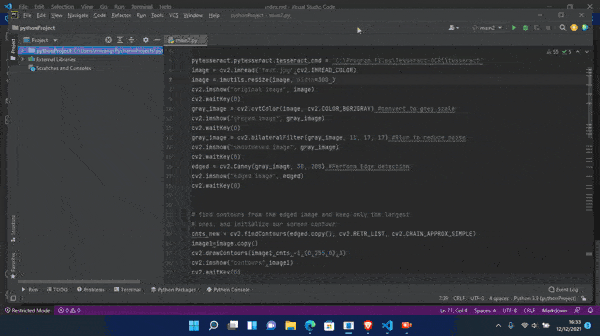
Now let’s dive into the fun part of coding. Type the following code on the main.py file that is automatically created by Pycharm.
importing the libraries we need
import cv2
import imutils
import pytesseract
In the code above, we are importing each library we discussed. This will enable us to use some of the functions we will require from them.
Specifying the path to which tesseract is installed
pytesseract.pytesseract.tesseract_cmd = 'C:\Program Files\Tesseract-OCR\\tesseract'
In the above code: 'C:\Program Files\Tesseract-OCR\\tesseract' is the path to which we installed tesseract. Replace this part with your path.
Taking in our image input and resizing its width to 300 pixels
image = cv2.imread('test.jpg')
image = imutils.resize(image, width=300 )
cv2.imshow("original image", image)
cv2.waitKey(0)
image = cv2.imread('test.jpg'): We are taking in the image as our input.test.jpgis the name of the image. Feel free to replace it with your own.image = imutils.resize(image, width=300 ): We are resizing our image.imageis the image we took as input. Forwidth=300we are resizing the width of that image to 300 pixels.cv2.imshow("original image", image): We are displaying the image after setting its width to 300 pixels.original imageis the name of the window that displays the image. Feel free to give it your name.cv2.waitKey(0): We are waiting for any key on the keyboard to be pressed to continue executing the code that follows.
Converting the input image to greyscale
gray_image = cv2.cvtColor(image, cv2.COLOR_BGR2GRAY)
cv2.imshow("greyed image", gray_image)
cv2.waitKey(0)
gray_image = cv2.cvtColor(image, cv2.COLOR_BGR2GRAY): We are creating a variablegray_image. We are then passing our input image tocv2.cvtColor.cv2.COLOR_BGR2GRAYspecifies that the image should be converted to grey image.cv2.imshow("greyed image", gray_image): We are displaying the image which is already converted to grey.
Reducing the noise in the greyscale image
gray_image = cv2.bilateralFilter(gray_image, 11, 17, 17)
cv2.imshow("smoothened image", gray_image)
cv2.waitKey(0)
gray_image = cv2.bilateralFilter(gray_image, 11, 17, 17): We are reducing the noise in the grey image hence smoothening it.cv2.imshow("smoothened image", gray_image): We are displaying the already smoothened image.
Detecting the edges of the smoothened image
edged = cv2.Canny(gray_image, 30, 200)
cv2.imshow("edged image", edged)
cv2.waitKey(0)
edged = cv2.Canny(gray_image, 30, 200): We are creating variableedged. We are then passing our smoothened image tocv2.cannyto detect the edges in it.cv2.imshow("edged image", edged): We are displaying the image with the detected edges.
Finding the contours from the edged image
cnts,new = cv2.findContours(edged.copy(), cv2.RETR_LIST, cv2.CHAIN_APPROX_SIMPLE)
image1=image.copy()
cv2.drawContours(image1,cnts,-1,(0,255,0),3)
cv2.imshow("contours",image1)
cv2.waitKey(0)
cnts: This represents the contours.RETR_LIST: It retrieves all the contours but does not create any parent-child relationship.CHAIN_APPROX_SIMPLE: Removes all the redundant points on the contours detected.image1=image.copy(): We are making a copy of the original input image. This is because we do not want to change the original image.cv2.drawContours(image1,cnts,-1,(0,255,0),3): We are drawing the identified contours on our image. Input the values as they are.cv2.imshow("contours",image1): We are displaying the image with the identified contours drawn around it.
Sorting the identified contours
cnts = sorted(cnts, key = cv2.contourArea, reverse = True) [:30]
screenCnt = None
image2 = image.copy()
cv2.drawContours(image2,cnts,-1,(0,255,0),3)
cv2.imshow("Top 30 contours",image2)
cv2.waitKey(0)
cnts = sorted(cnts, key = cv2.contourArea, reverse = True) [:30]: We are sorting contours based on the minimum area 30 and ignoring the ones below that.screenCnt = None: Stores the number plate contour.cv2.drawContours(image2,cnts,-1,(0,255,0),3): Draws the sorted contours on the image.cv2.imshow("Top 30 contours",image2): Displays the image which contains the top 30 contours drawn around it.
Finding the contour with four sides
i=7
for c in cnts:
        perimeter = cv2.arcLength(c, True)
        approx = cv2.approxPolyDP(c, 0.018 * perimeter, True)
        if len(approx) == 4:
                screenCnt = approx
for c in cnts:: We are creating a for loop over the contours we did sort. This is to find the best contour of our expected number plate.perimeter = cv2.arcLength(c, True): Perimeter is also referred to as arclength. We are using the arclength function to find it.cv2.approxPolyDP(c, 0.018 * perimeter, True): ApproxPolyDP approximates the curve of polygon with precision.if len(approx) == 4:: chooses the contours with four sides as this will probably be our number plate.
Cropping the rectangular part identified as license plate
x,y,w,h = cv2.boundingRect(c)
new_img=image[y:y+h,x:x+w]
cv2.imwrite('./'+str(i)+'.png',new_img)
i+=1
break
x,y,w,h = cv2.boundingRect(c): This finds the coordinates of the part identified as the license plate.cv2.imwrite('./'+str(i)+'.png',new_img: Stores the new image of the cropped number plate.break: breaks the for loop.
Drawing the selected contour on the original image
cv2.drawContours(image, [screenCnt], -1, (0, 255, 0), 3)
cv2.imshow("image with detected license plate", image)
cv2.waitKey(0)
cv2.drawContours(image, [screenCnt], -1, (0, 255, 0), 3): This draws the contour selected to be the number plate on our original image.cv2.imshow("image with detected license plate", image): Displaying the final image that has a contour drawn over the number plate.
Extracting text from the image of the cropped license plate
Cropped_loc = './7.png'
cv2.imshow("cropped", cv2.imread(Cropped_loc))
plate = pytesseract.image_to_string(Cropped_loc, lang='eng')
print("Number plate is:", plate)
cv2.waitKey(0)
cv2.destroyAllWindows()
Cropped_loc = './7.png': This is the file name of the cropped image of the license plate.cv2.imshow("cropped", cv2.imread(Cropped_loc)): We are displaying the image of the cropped license plate part.plate = pytesseract.image_to_string(Cropped_loc, lang='eng'): We are passing the image of the cropped part of the license plate. We are then calling on pytesseract to extract the text on the image.print("Number plate is:", plate): We are printing out the extracted text.cv2.destroyAllWindows(): We are closing all the open windows.
Results
When the program has run successfully, its output is as follows:
Conclusion
You now have all the skills required to create a program that detects and recognizes license plates. Capture more images of vehicles and input them into the program then sit back and watch as the program does its magic.
Happy coding!


Comments: