


Open Authorization (OAuth) is a service that allows websites or apps to share user information with other websites without being given a users password. Users can log in to multiple websites with the same account without creating other credentials.
Some of the most popular OAuth service providers are Google, Facebook and GitHub. In this tutorial, we look at registering users in a Django app using Google OAuth.
Prerequisites
To follow along with this tutorial, you need Python3 installed on your machine.
Step 1 – Create and set up a new Django project
Create a new virtual environment using the command below.
$ python3 -m venv virtual
Activate the created virtual environment by running the command below.
$ source virtual/bin/activate
Then, install the latest version of Django from PyPI by running the following command.
$ pip install django
Then, create a new Django project using the command:
$ django-admin startproject oauth_project .
Then, create a Django app using this command:
$ python manage.py startapp oauth_app
Then, apply the database migrations using the migrate command:
$ python manage.py migrate
Register the oauth_app to the oauth_project project by adding it to INSTALLED_APPS in settings.py.
djangooauth/settings.py
INSTALLED_APPS = [
    #...
    'django.contrib.sites',
    'oauth_app',
]
Step 2 – Install and set up django-allauth
To integrate Google OAuth features into our app, we will use django-allauth.
Install the package from Pypi by running the command:
$ pip install django-allauth
Then register django-allauth by adding it to INSTALLED_APPS in settings.py.
djangooauth/settings.py
INSTALLED_APPS = [
    #...
    'allauth',
    'allauth.account',
    'allauth.socialaccount',
    'allauth.socialaccount.providers.google',
]
The line allauth.socialaccount.providers.google specifies the OAuth provider since django-allauth supports many OAuth providers.
We will also set django-allauth as the authentication backend for our application in the AUTHENTICATION_BACKEND configurations.
At the bottom of settings.py, add the following code:
djangooauth/settings.py
AUTHENTICATION_BACKENDS = [
    'django.contrib.auth.backends.ModelBackend',
    'allauth.account.auth_backends.AuthenticationBackend'
]
Then set Google as the OAuth provider under SOCIALACCOUNT_PROVIDERS configurations.
djangooauth/settings.py
SOCIALACCOUNT_PROVIDERS = {
    'google': {
        'SCOPE': [
            'profile',
            'email',
        ],
        'AUTH_PARAMS': {
            'access_type': 'online',
        }
    }
}
The SCOPE specifies what is requested from Google APIs. If the scope is not specified, it defaults to profile . To refresh authentication in the background, set AUTH_PARAMS['access_type'] to offline.
Then add a site ID and redirect users to the base route after a successful login or logout.
djangooauth/settings.py
SITE_ID = 2

LOGIN_REDIRECT_URL = '/'
LOGOUT_REDIRECT_URL = '/'
Step 3 – Create and configure templates
We will be using Django templates to display the Login with Google button. Create a new folder called templates in your base directory. Then create a file index.html inside the templates folder.
$ mkdir templates
$ cd templates
$ touch index.html
Open index.html and put the following code:
templates/index.html
{% load socialaccount %}
<html>
<body>
<h1>My Google OAuth Project </h1>
{% if user.is_authenticated %}
  <p>Welcome, You are logged in as {{ user.username }}</p>
{% else %}
  <a href="{% provider_login_url 'google' %}">Login With Google</a>
{% endif %}
</body>
</html>
The code above checks if the user is authenticated. If true, the username is displayed. If not, the “Login with Google” link is displayed. On clicking the link, the user will be directed to the Google OAuth dialog.
Then, register this templates folder in the TEMPLATES configurations in settings.py.
djangooauth/settings.py
TEMPLATES = [
    {
        'BACKEND': 'django.template.backends.django.DjangoTemplates',
        'DIRS': [BASE_DIR / 'templates'],
        'APP_DIRS': True,
        #...
    }
]
Step 4 – Configure OAuth URLs
Open the project’s urls.py and put add the following code.
djangooauth/urls.py
#...
from django.urls import path, include
from django.views.generic import TemplateView
from django.contrib.auth.views import LogoutView

urlpatterns = [
    #...
    path('', TemplateView.as_view(template_name="index.html")),
    path('accounts/', include('allauth.urls')),
    path('logout', LogoutView.as_view()),
]
We add a base route that will display our template index.html. We also add a route /accounts that “includes” django-allauth URLs. All OAuth operations will be performed under this route. We also add the default Django logout view at /logout.
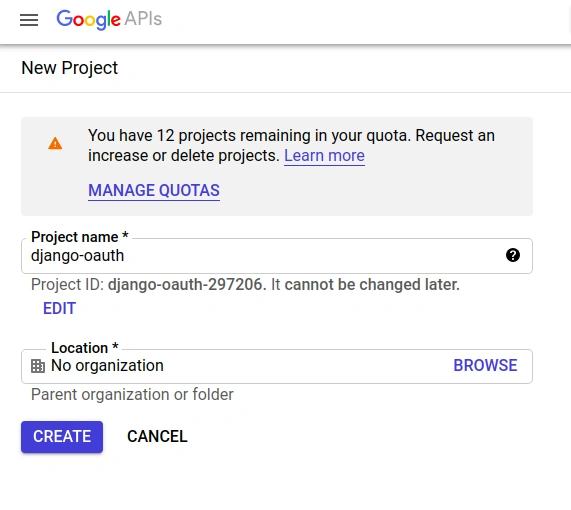
Step 4 – Create and configure a new Google APIs project
Head over to Google Developer APIs Console and create a new project.
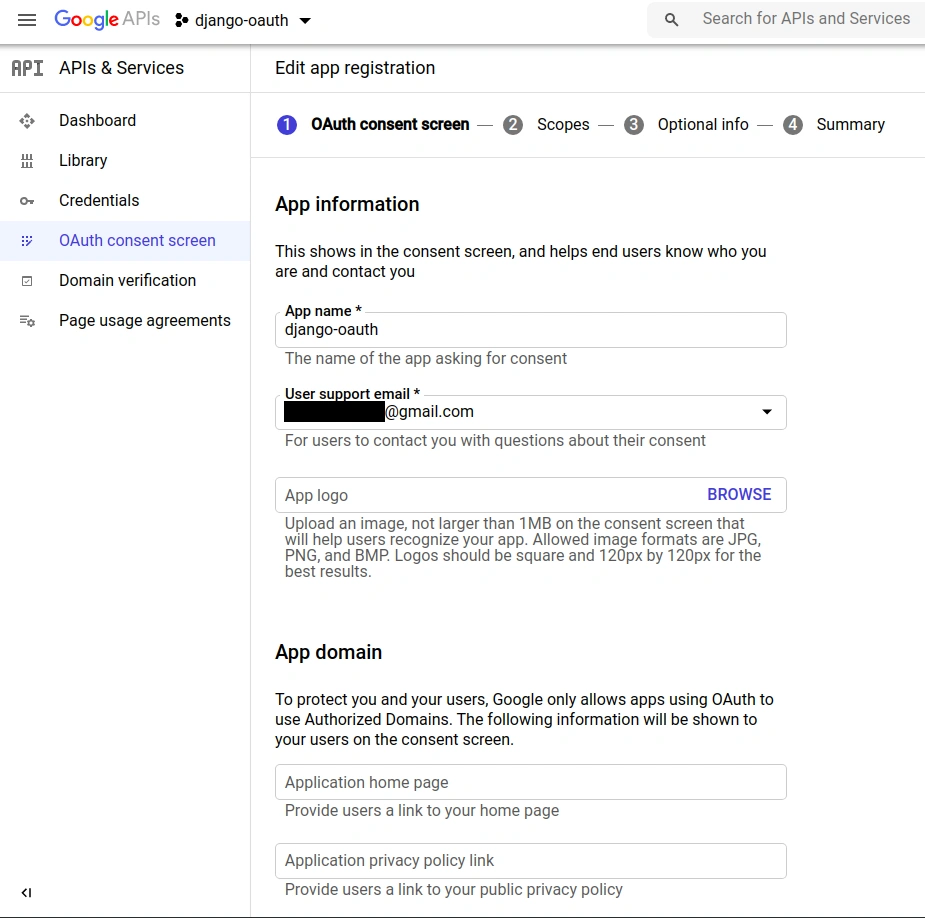
Then, register your app by filling the OAuth consent screen.
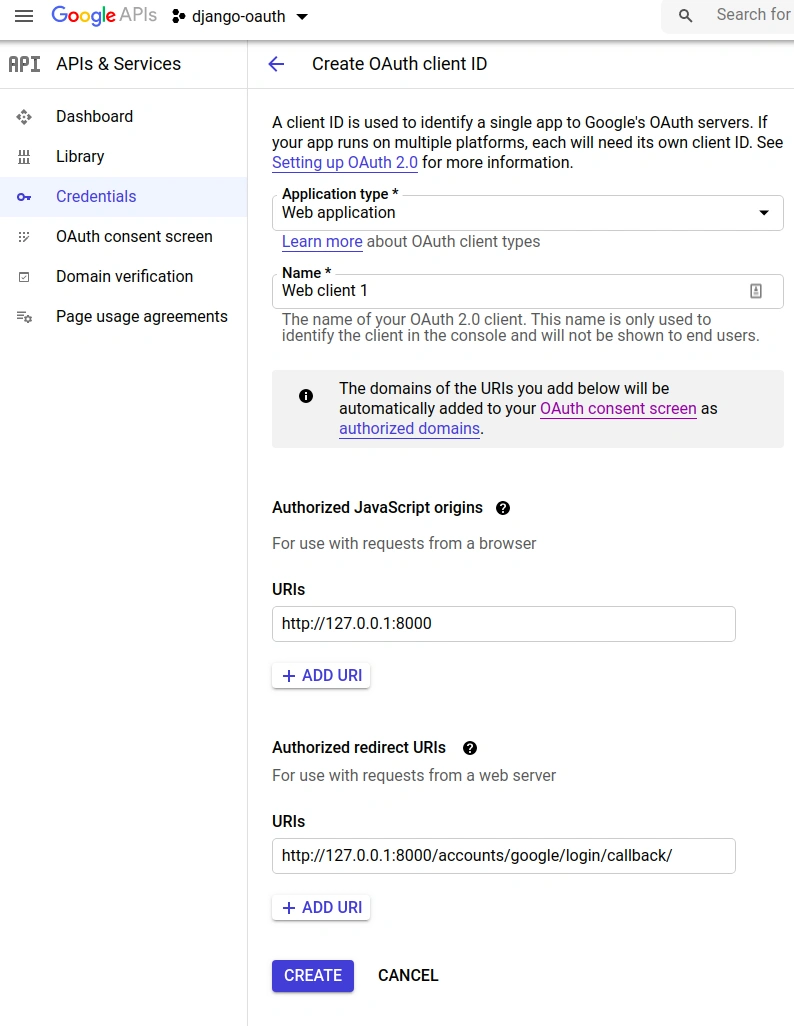
Then, create a new OAuth client ID under Credentials. Select Web application for the Application type.
Then, add:
http://127.0.0.1:8000under Authorized JavaScript origins.http://127.0.0.1:8000/accounts/google/login/callback/under Authorized redirect URIs.
After a successful OAuth client ID creation, copy Your Client ID and Your Client Secret, you will need them in step 5.
Step 5 – Add a social app in Django admin
Now, make the migrations using this command:
$ python manage.py migrate
Then, create a superuser by running the following command in a terminal.
$ python manage.py createsuperuser
Run the app using:
$ python manage.py runserver
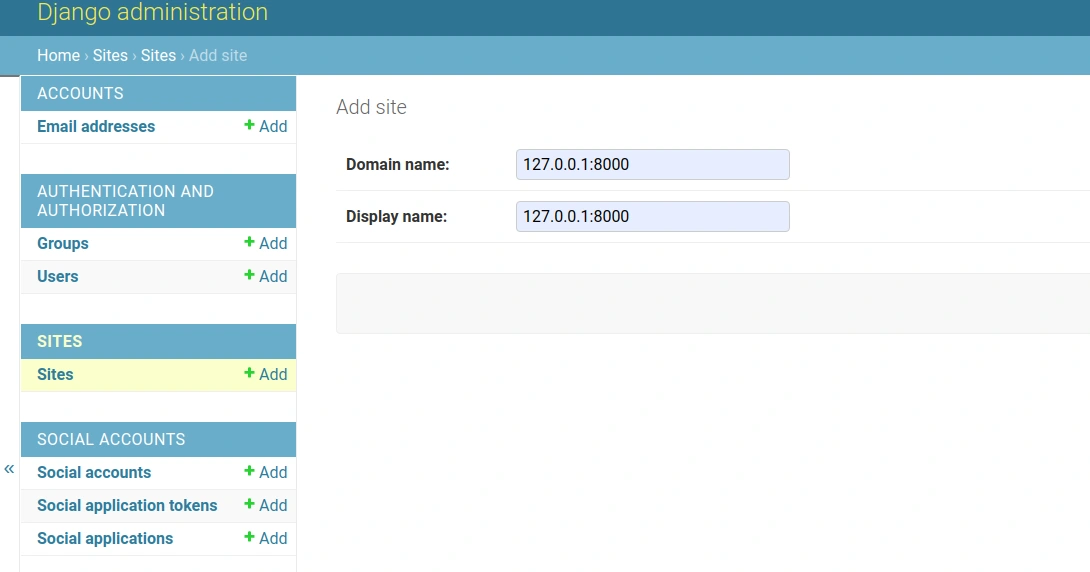
Open http://127.0.0.1:8000/admin and login to Django Admin. Under Sites click Add and put 127.0.0.1:8000 as both the Domain name and Display name.
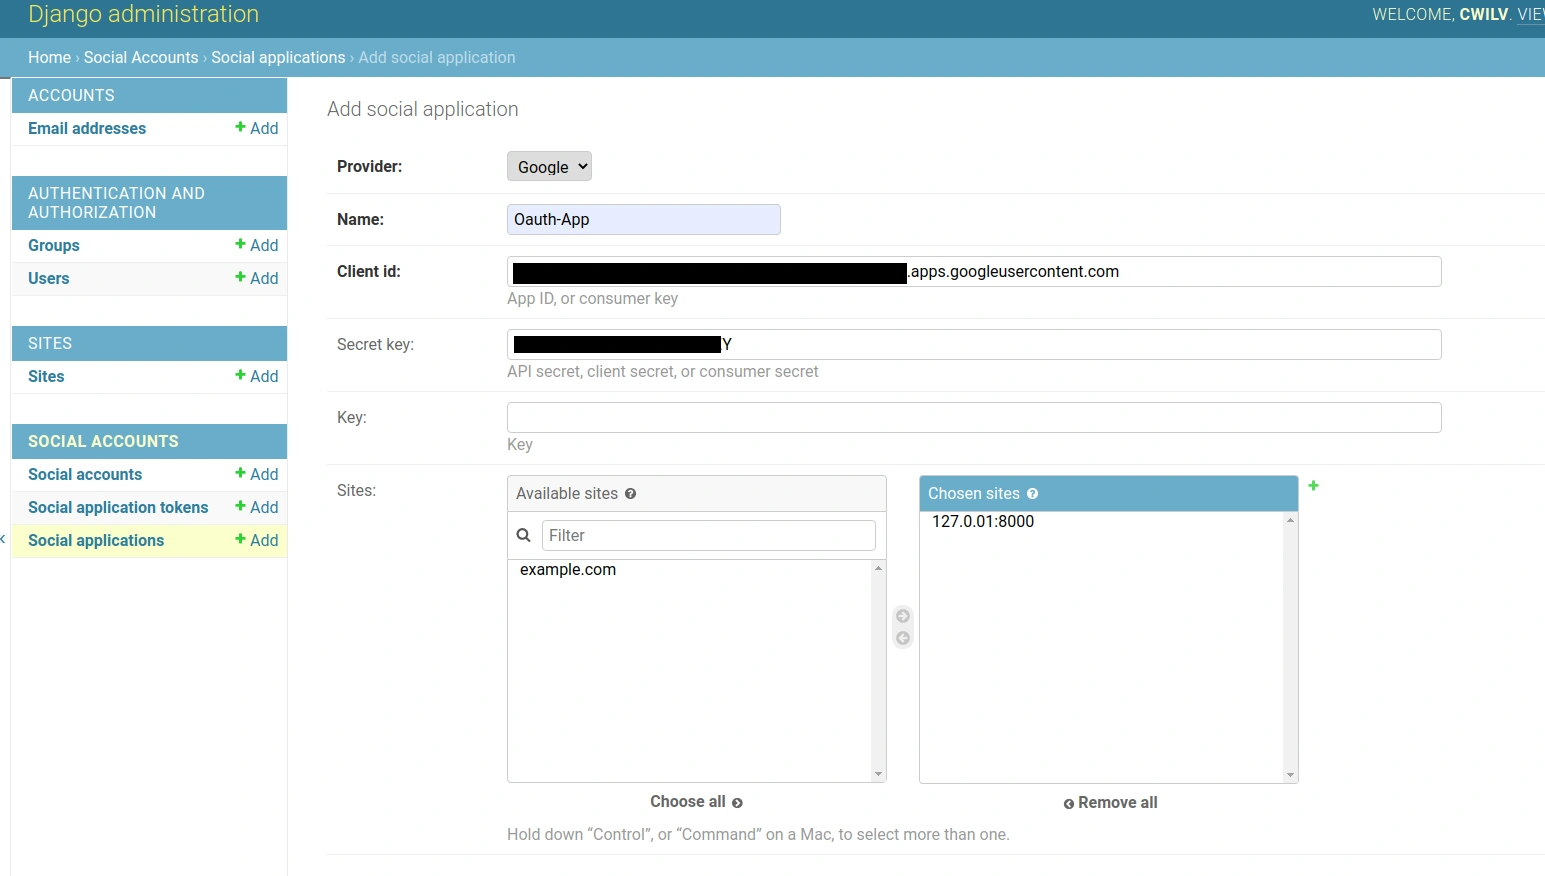
Then, under Social Applications click Add and fill in the details as follows:
- Provider: Google
- Name: OAuth App
- Client id: <The client ID you created in step 4>
- Secret key: <The Secret key you created in step 4>
- Sites: 127.0.0.1:8000
Since you are currently logged in as a superuser, logout and login again using your Google account.
If you get an error: SocialApp matching query does not exist at http://127.0.0.1:8000/accounts/google/login/, it means that the ID of the site you created in Django admin is not the same as the one in settings.py. Consider playing around with the SITE_ID value.
For example: SITE_ID = 3, etc.
For more information look at Django “sites” framework docs.
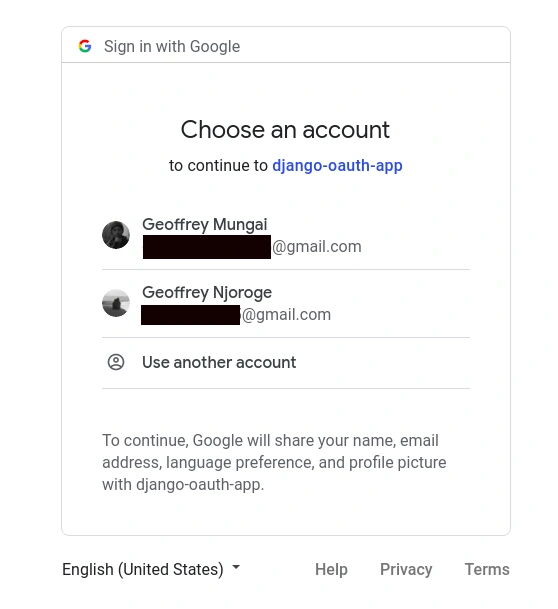
After signing in with Google, you can check the user information obtained from Google at: http://127.0.0.1:8000/admin/socialaccount/socialaccount/.
Google provides little information about its users. To get more user information from Google, your app needs to be verified.
Conclusion
You can integrate Google OAuth into your Django application with Django OAuth packages like django-allauth. You can also integrate other OAuth services similarly using django-allauth.
Happy Coding!


Comments: